Larry 43 Kubel Nr 24973
Guest
|
Post by Larry 43 Kubel Nr 24973 on Aug 2, 2008 10:36:59 GMT 1
Drew,
It's great to see that your Kubel is coming along so well! Did you by any chance make copies of the original service sticker/generator belt instructions that is on the fan shroud? I would absolutely LOVE to obtain a copy for my 1943 Kubel!
Please e-mail me at:
wessels1944@yahoo.com
Kind regards and best wishes for a fully restored Kubel,
Larry
|
|
|
|
Post by drew on Aug 3, 2008 19:51:28 GMT 1
Hi Larry Yes I have created hi-res artwork for the sticker and printed them on correct paper so drop me an email and I will pop one in the post. 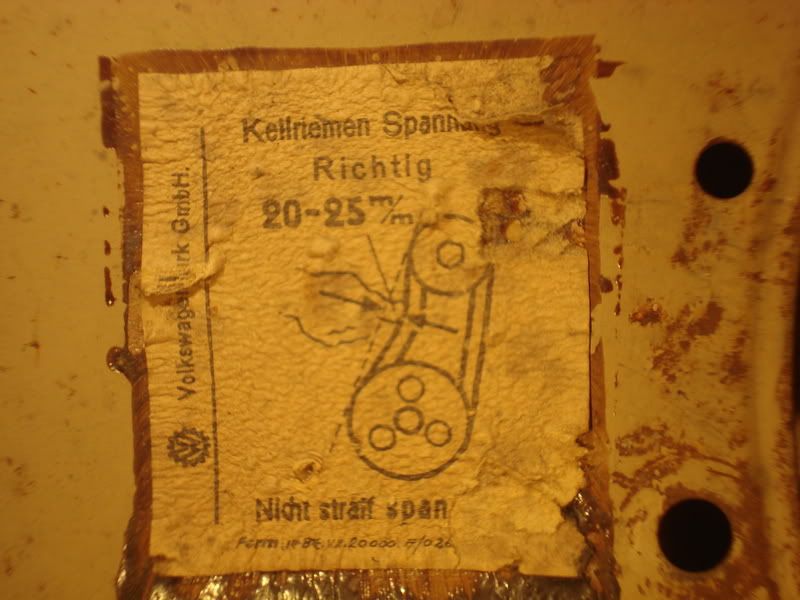 Regards Drew drew.s@inferno-group.com |
|
|
|
Post by drew on Aug 3, 2008 20:13:13 GMT 1
Hi Volkswagen I am currently working on two Kdf engines. The fisrt and best condition is 2-067768 Casting date 31-1-44 With matching case number 269 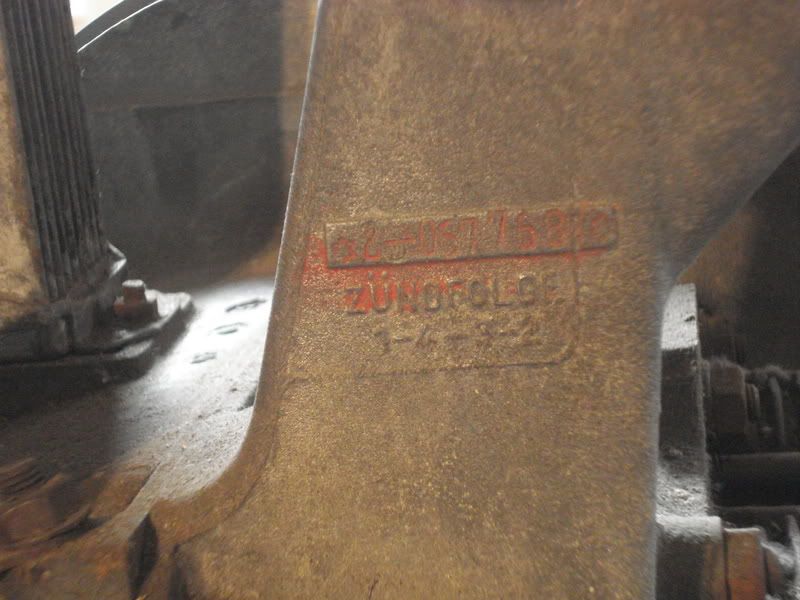 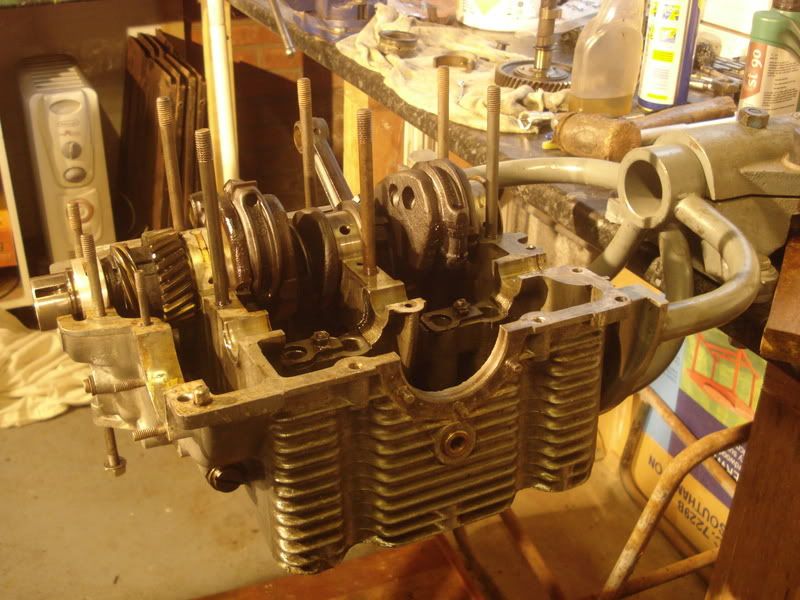 The case is in perfect condition, I am rebuilding it with all Kdf parts, pistons, cylinders, con rods, heads etc. but with new rings and bearings. The second engine is 2-036457 Casting date 1-22-43 With matching case number 942 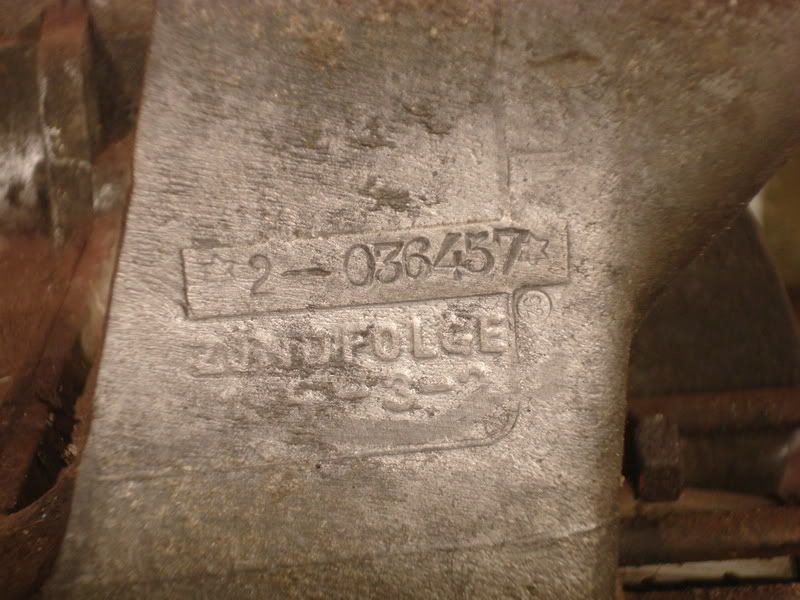 I have dismantled this engine, it is in a poor condition. Internaly it is fine but it will need some careful aluminium welding to sort out a corrosion hole in the sump. I will be selling this case if anyone is interested. Regards Drew |
|
|
|
Post by drews on Sept 28, 2008 22:05:25 GMT 1
Hi All Thought I would bring you up to date on the kubel. 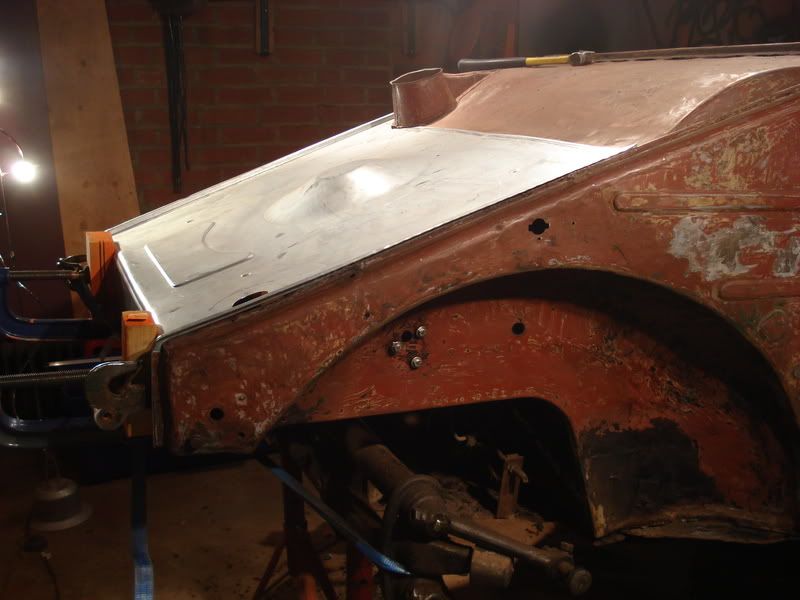 First a trial fit of the new front metal, the repro panel is very acurate but I found that the kubel had sustained a side knock at some point and twisted the front by a couple of centimeters. Luckily I had'nt removed the body from the floor pan so I used the front crossmember as an anchor to pull the body straight before welding. 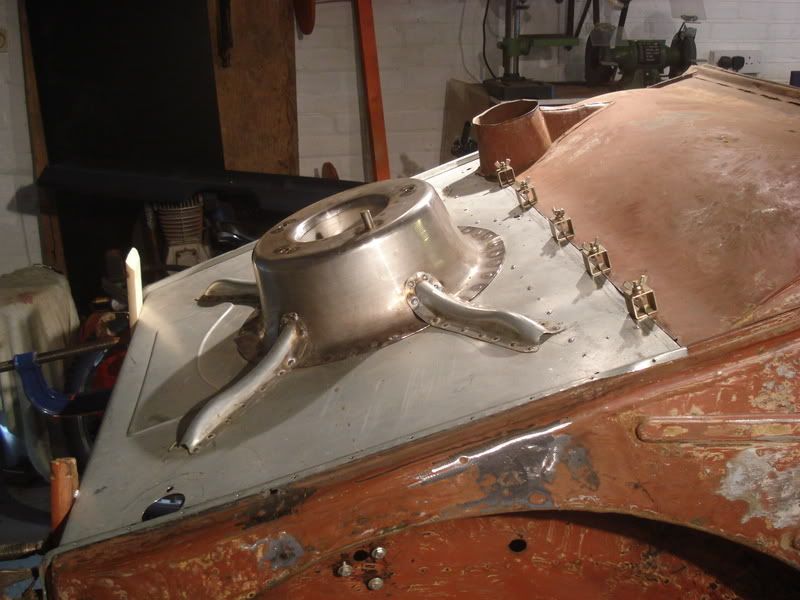 After welding on the spare wheel parts it was time to align, fold over and weld the seams and butt weld the area above the petrol tank, I used intergrips and welded in very short sections to minimise destotion. The final result after careful grinding will be as close to original as I can get and once painted will look completly original. 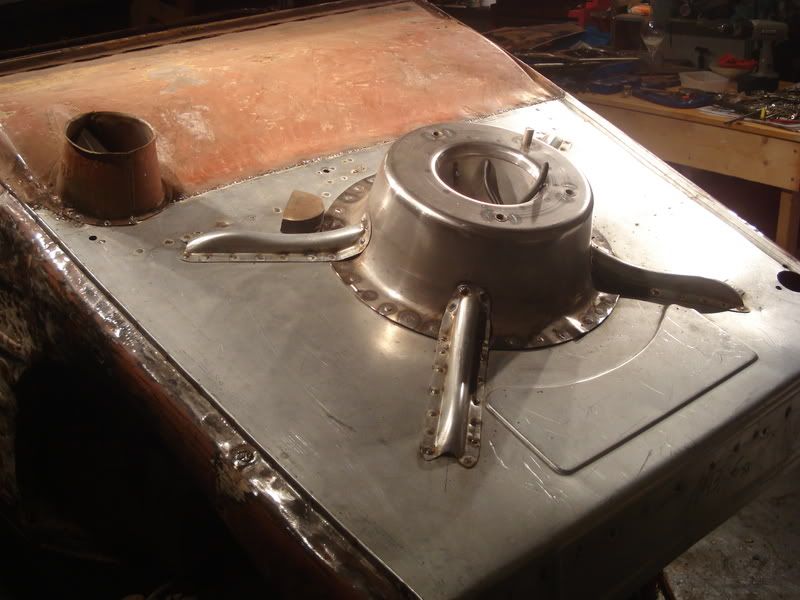 The next job is the rear bodywork, I have just recieved a large delivery from Vladimir and the project is starting to come together. More pics soon. Regards Drew |
|
|
|
Post by Cj on Oct 1, 2008 10:20:11 GMT 1
Hi Drew - I love what you are doing with the Kubel. I have a 1943 Kubelwagen which has sat in storage for about 4 years and I just pulled it into my garage this week to start work on it. Much of what I have to do is similar to what you have done already - front end repair. Have you any more pics of the restoration? I would also be interested in getting one of those service sticker/generator belt instructions stickers from you if you have any available?
I also have sills to repair on the kubel - inner and outer - and I am interested in seeing some pics of the sills being put in if anyone has them - also any pics to see how they fit in with the front quarter panel would be very much appreciated.
Cj
|
|
|
|
Post by drew on Mar 28, 2009 17:26:35 GMT 1
Hi All Here is the start on the rear end. 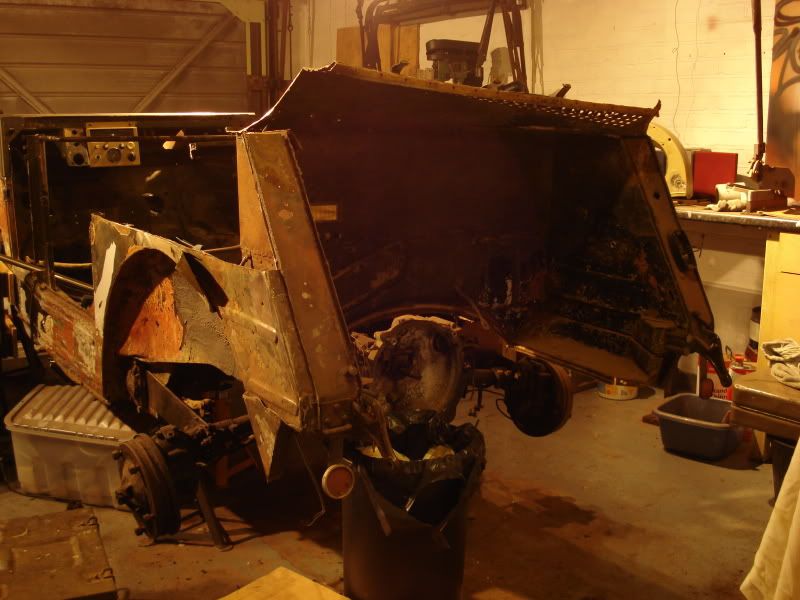 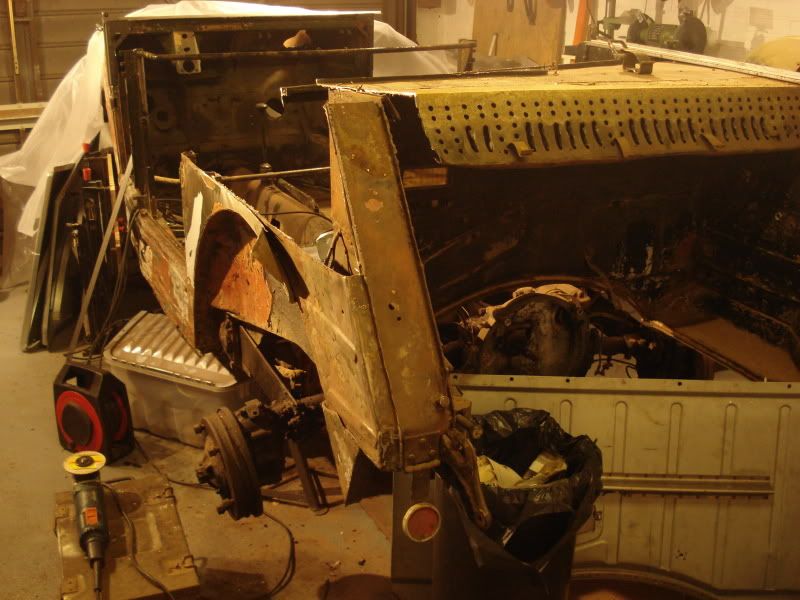 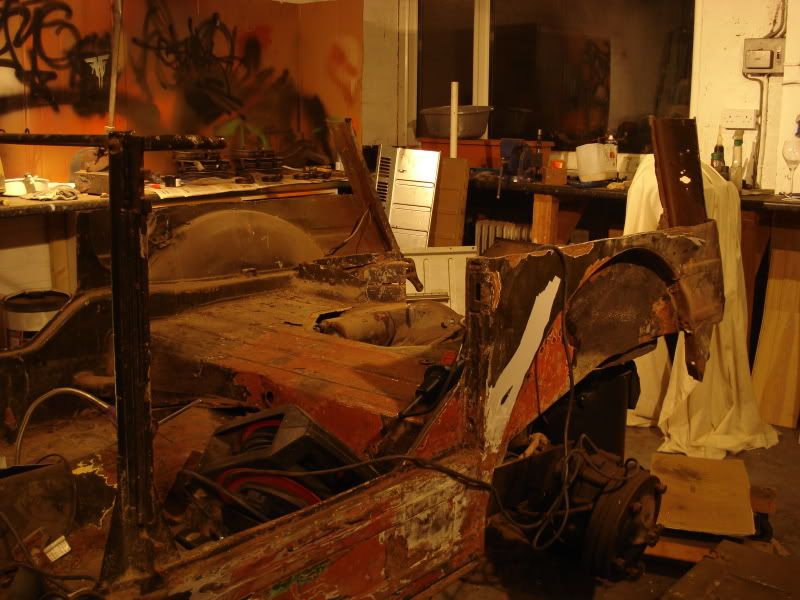 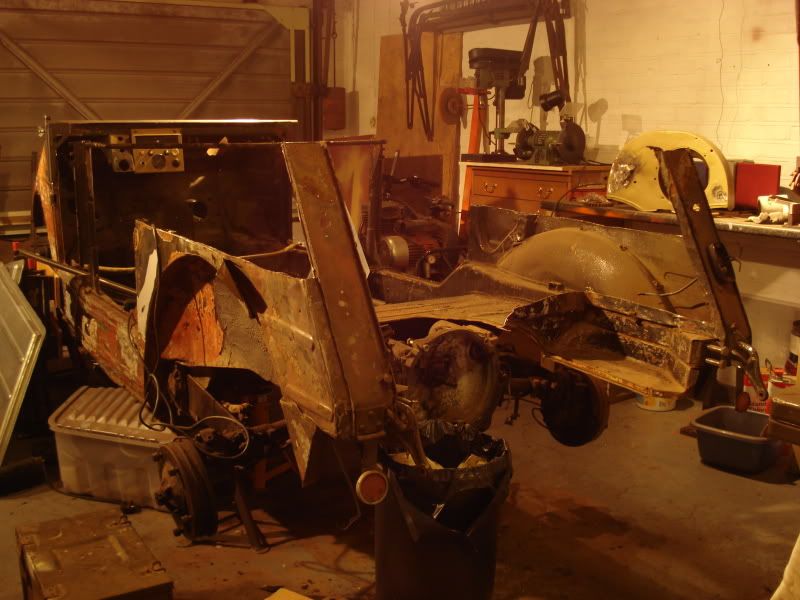 I have been debating wether to leave the original lower panelwork and but weld up to it with new panels. But have decided to replace the entire section and spot weld as original. I will share pics of the entire panel romoved soon. Regards Drew |
|
|
|
Post by drew on Mar 28, 2009 17:40:41 GMT 1
Here is the first side panel removed. 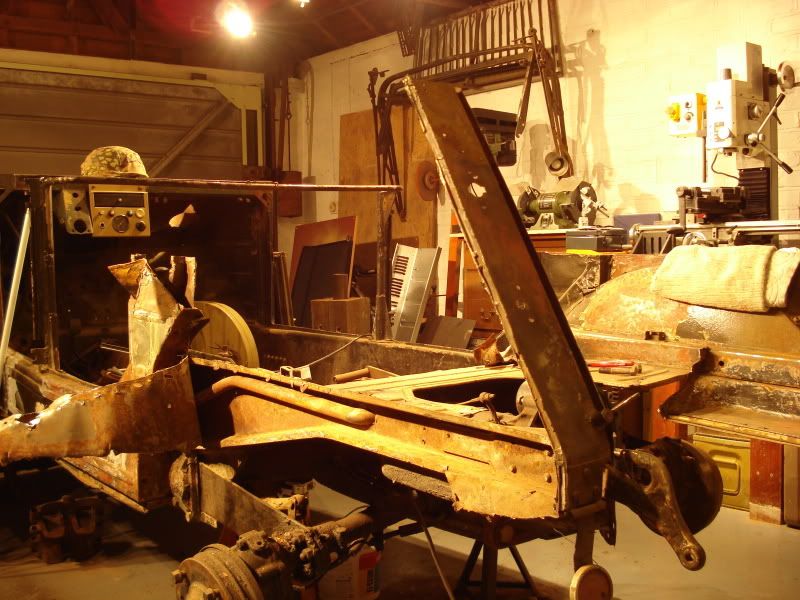 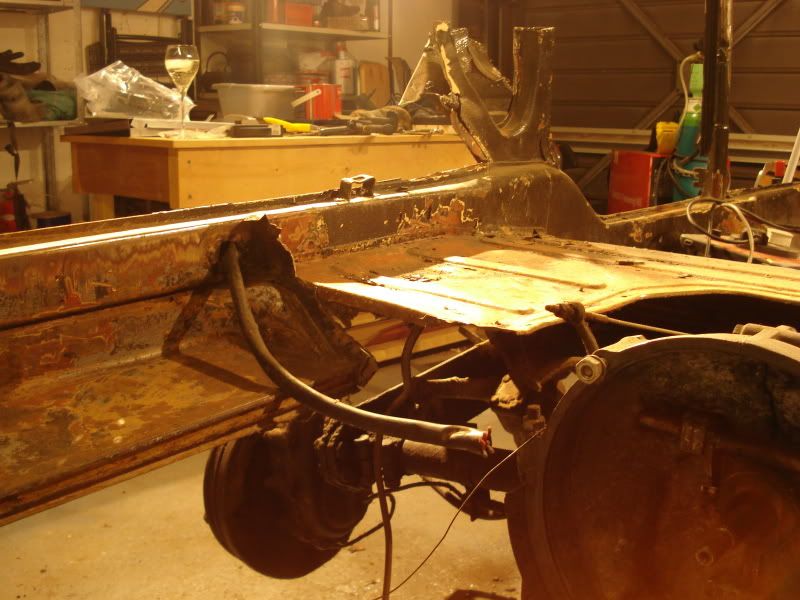 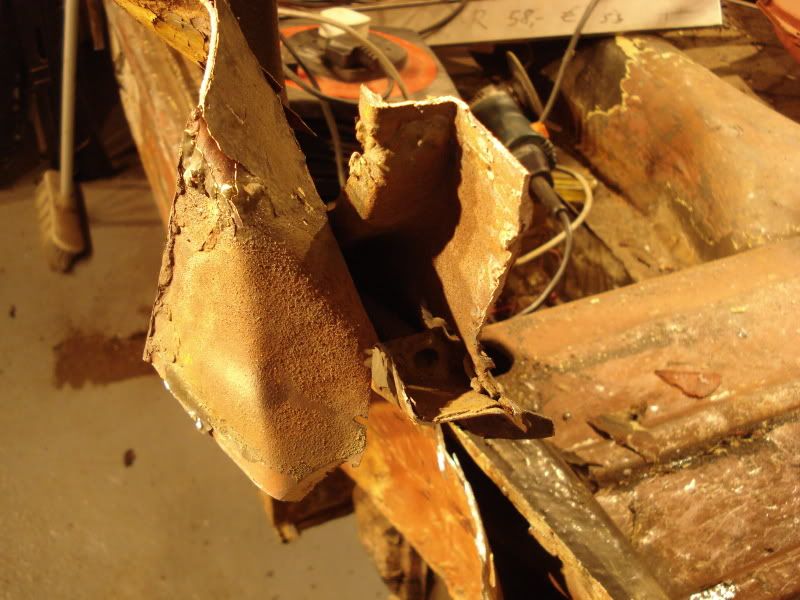 In the last picture you can just make out the rain water drain tube that passes behind the panel and exits on the door jam. Regards Drew |
|
|
|
Post by drew on May 5, 2009 22:14:16 GMT 1
Hi All Well Spring is here and it's time to get stuck into the rear body work on the old 44. After a lot of debating I have decided to replace whole panels it will hopefully give a better end resault. The first pic shows the rain water tube exposed. 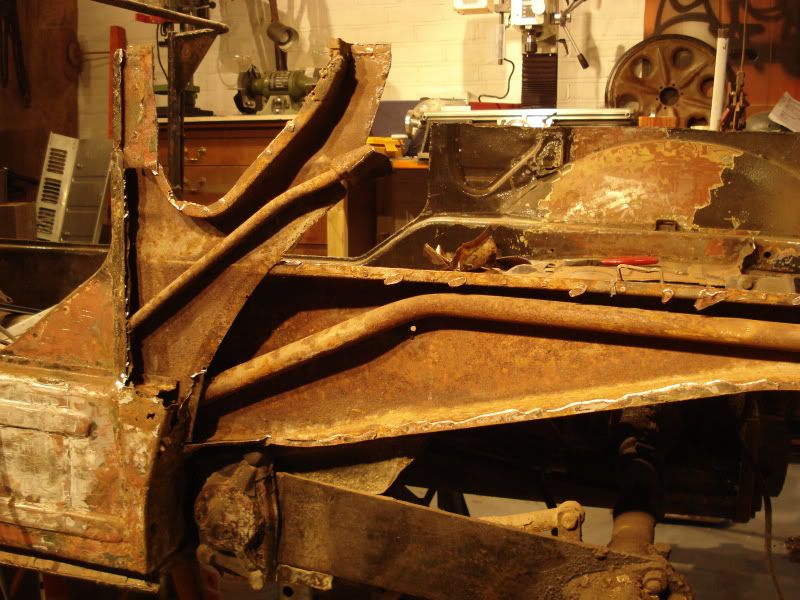 The following sequence shows the new panels being trial fitted, held in place with clamps and screws, I am using an original door to get the ribs to line up. 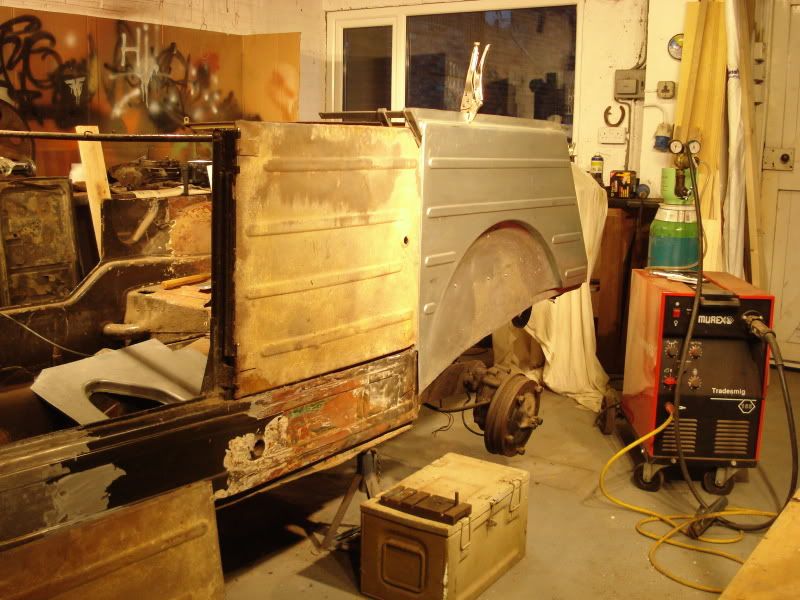 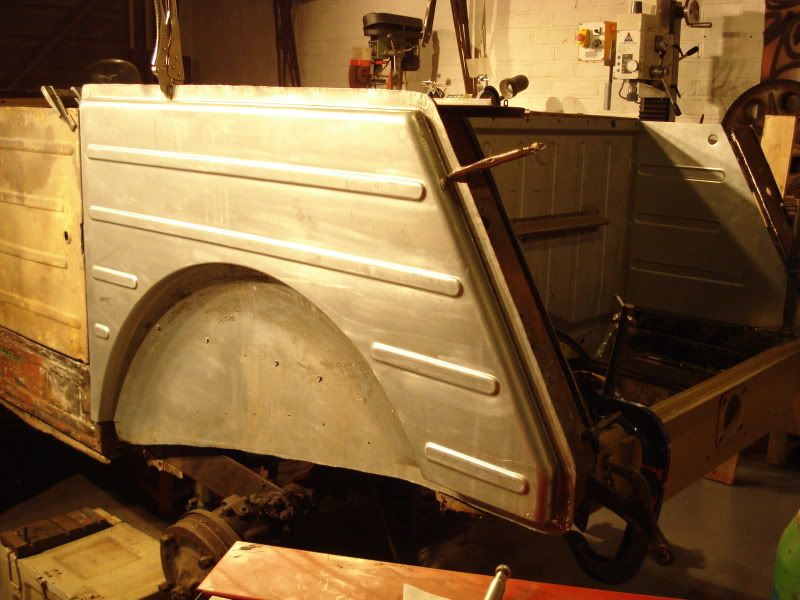 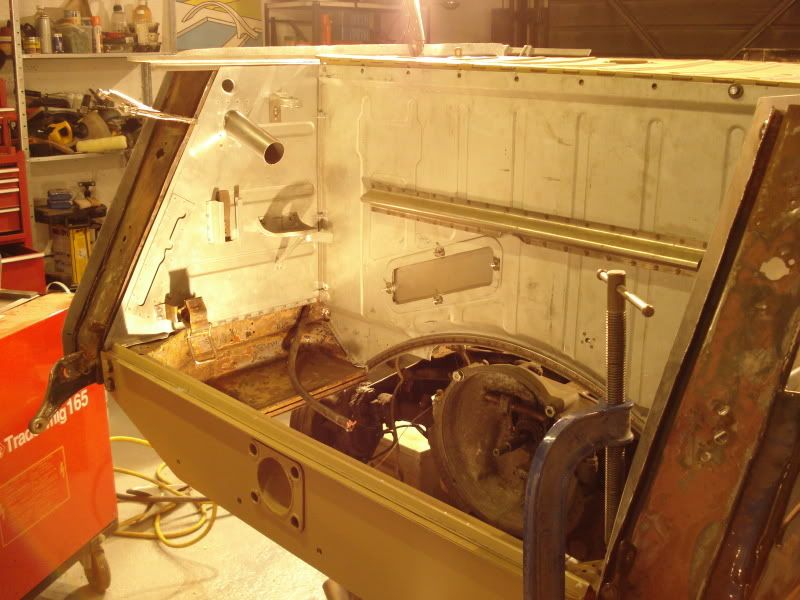 My intention is to build the entire rear section complete with engine lid in this manner and only when everything lines up 100% then spot weld everything in place. Till next time Regards Drew |
|
v3000s
Obergefreiter

Posts: 18
|
Post by v3000s on May 7, 2009 11:42:57 GMT 1
Very nice work  - I am at the same stage myself so I know exactly what you are going through. I too struggled with trying to hold on to original panels but in th end common sense prevails. I think you made the right decision to replace the entire panel - as painful as it it - you now have a quality panel that will last a life time and more and importantly you know its all good metal.  V3000S |
|
|
|
Post by mvnut on May 7, 2009 22:06:37 GMT 1
HI Drew,
excellent idea doing a full replacement. it will reduce the time spent on smoothing the exterior panels after putting welds all over the place. maybe you already thought of this but its a good idea to etch prime the insides of all the panels before final assembly. I normally mask out the spot weld areas and prime the panel, remove the masking tape and spray the weld areas with zinc/weld thru primer. A good primer would be a 2pac epoxy etch primer. finding a tintable brand would be good because you could have the colour changed to red oxide. another benefit with most 2pac etch primers- you can put plastic filler on top of the primer so there is a layer of paint between the bog and the steel to reduce the chance of rust forming under the filler. with 2pac paints you need to have adequate safety equipment as some ingredients are poisonous. I having great success with semi gloss 2pac top coats on my restos ( great adhesion and long term protection) but lacquer primer and topcoats may be compatable with 2pac etch primer. check with the supplier. our paint colour match guy has a machine that can checks the amount of gloss on a original sample of german kit and can create a paint mixing code for future reference.
when final fitting a sub assembly we FIT THE WHOLE CAR UP with panels and fittings, all lock and latches and assess all gaps and heights of panels before welding. A good visual check is to look at the back of the kubel, sighting along the top of the rear section. it should be parallel to the top horizontal panel above the dash board. its a quick way to find any twist between front and rear sections.
best of luck
MVNUT
|
|
|
|
Post by drew on Nov 16, 2009 13:51:31 GMT 1
Hi Guys Here are the latest pics of my restoration. I have just started to weld the rear panels into place, it turned out to be much more involved than I thought, with every panel having to be adjusted millimeter by millimeter until all panels lined up perfectly. I ended up using a lazer level to get everything just right. It should start to come together much quicker now this major hurdle is almost completed. 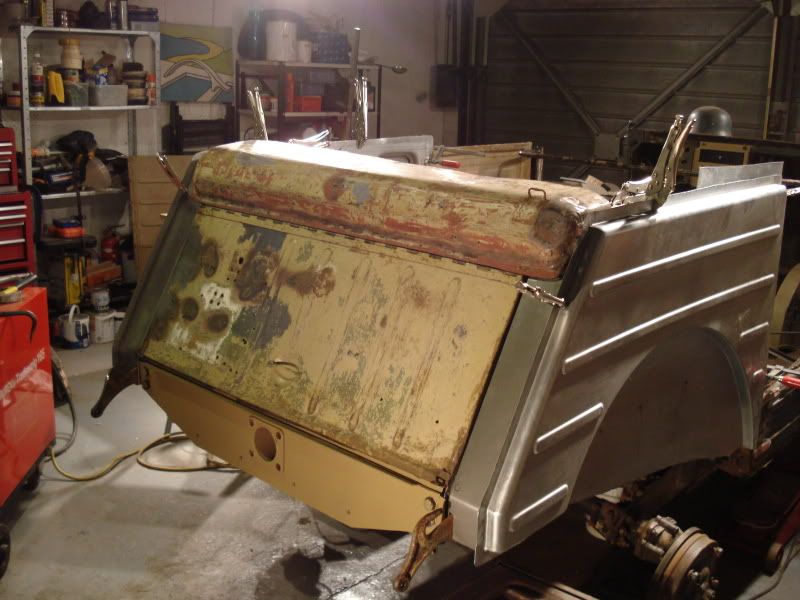 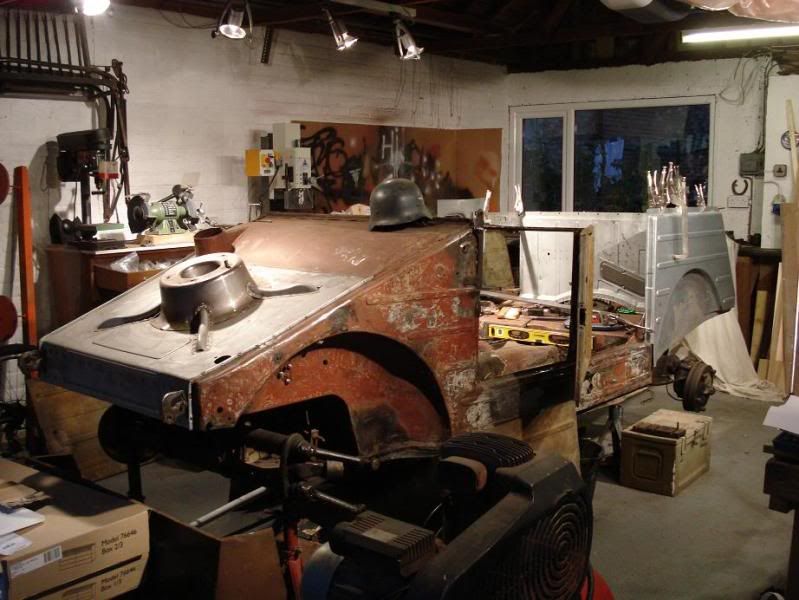 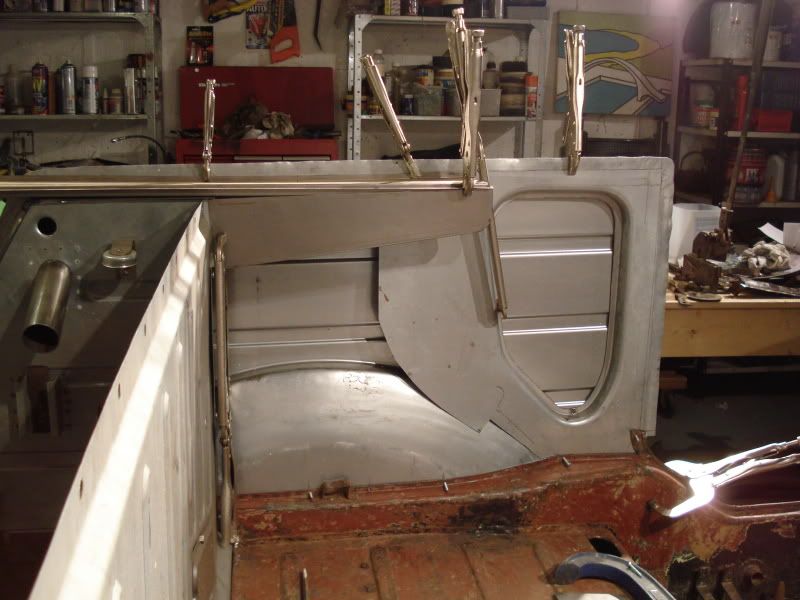 More pics to follow soon. Regards Drew |
|
|
|
Post by mattholloway on Jan 18, 2011 21:24:34 GMT 1
any more updates drew?
thanks
matt
|
|
|
|
Post by loica on Jan 18, 2011 21:38:44 GMT 1
Hello Drew,
nice work you made. When we will see more of it?
Did you take check parts and was the meisuring of this correct?
|
|
|
|
Post by wwiivehicle on Feb 6, 2011 7:50:59 GMT 1
Hi gentlemen.
any one saw a VW 87 or just a chassis? or body? the axle is wide than a 166 front axle?
if you have any news about VW 87, or a Kdf 82e body, please e mail me ,My e mail address
wwiivehicle@yahoo.com
Thank you very much.
Victor
|
|
|
|
Post by dennisbcarney on Apr 10, 2011 19:22:45 GMT 1
Hi Drew,
Do you still have the other engine for sale, my engine is currently a later one & am thinking of sourcing an original at some time. What would you be looking for it?
Thanks,
Dennis
|
|


 - I am at the same stage myself so I know exactly what you are going through. I too struggled with trying to hold on to original panels but in th end common sense prevails. I think you made the right decision to replace the entire panel - as painful as it it - you now have a quality panel that will last a life time and more and importantly you know its all good metal.