|
|
Post by drew on Sept 18, 2011 15:27:30 GMT 1
As promised this weekends progress. Re-fitted the restored cog wheel steering box. 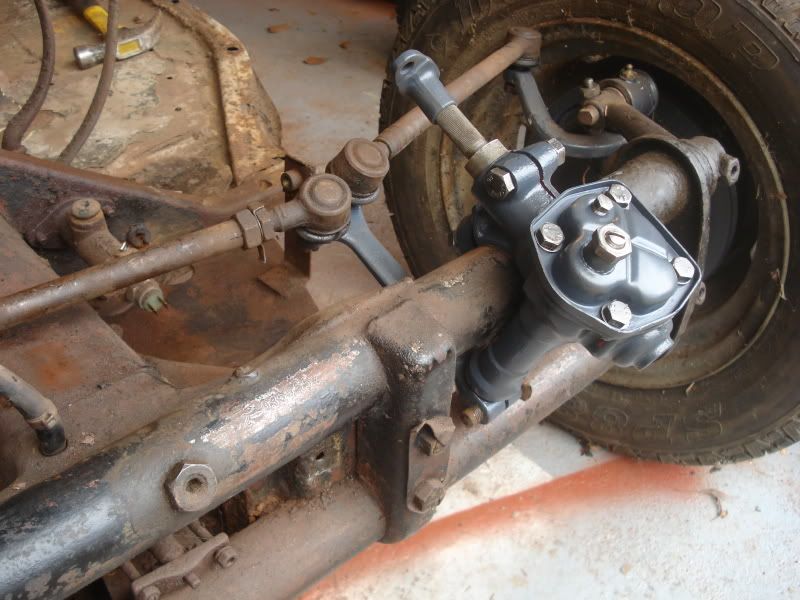 Have uncovered the front beam number 2-035955*. 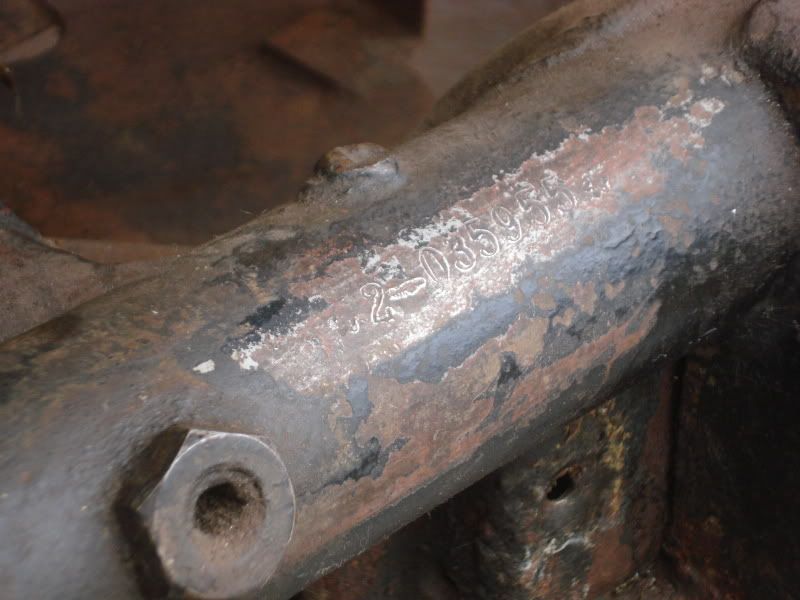 And spent a couple of hours cearfuly painting the original Police number on the front and re-uniting the body with the chassis. 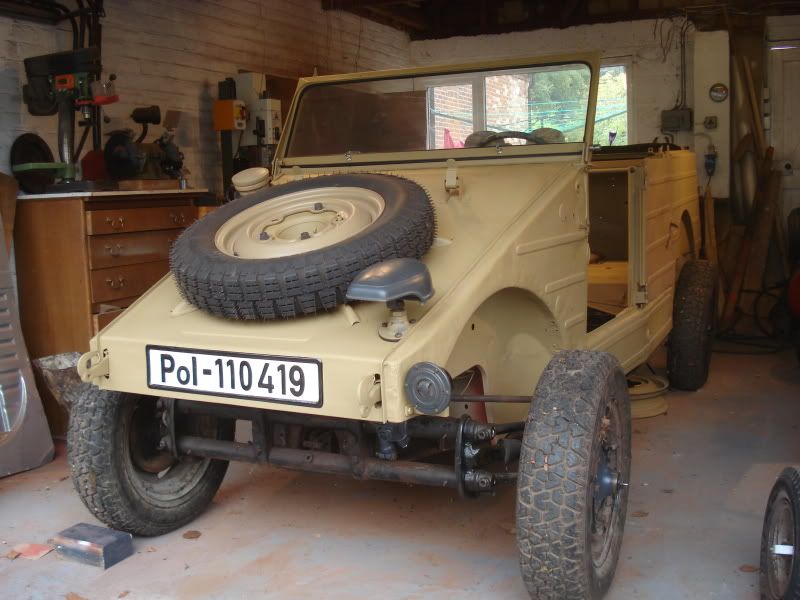 More pics soon. Regards Drew |
|
|
|
Post by drew on Oct 1, 2011 18:38:05 GMT 1
Hi All Here are the latest updates. Wings and lights fitted. Next up is to re-fit the doors and put tyres on the original rims. If anyone has a couple of 16X3 riveted rims lying around let me know as I'm missing 2. 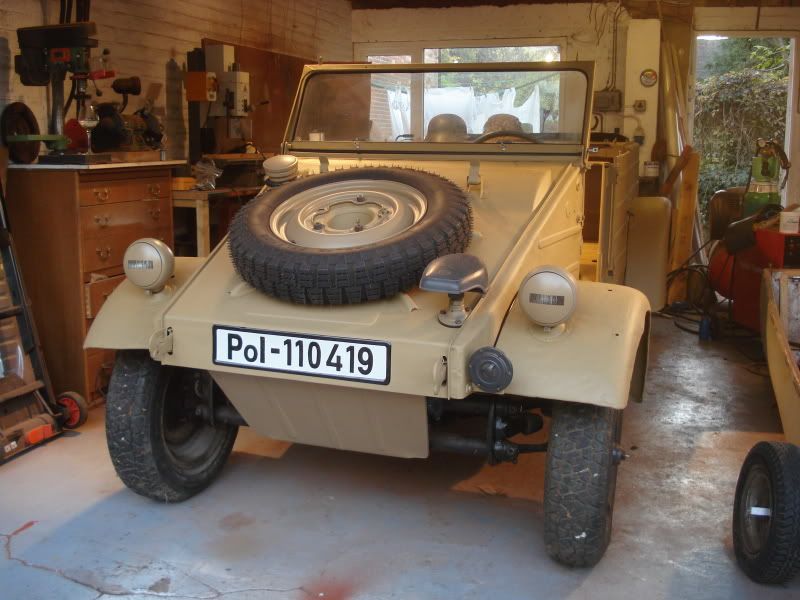 I have saved the original number plate on the back. 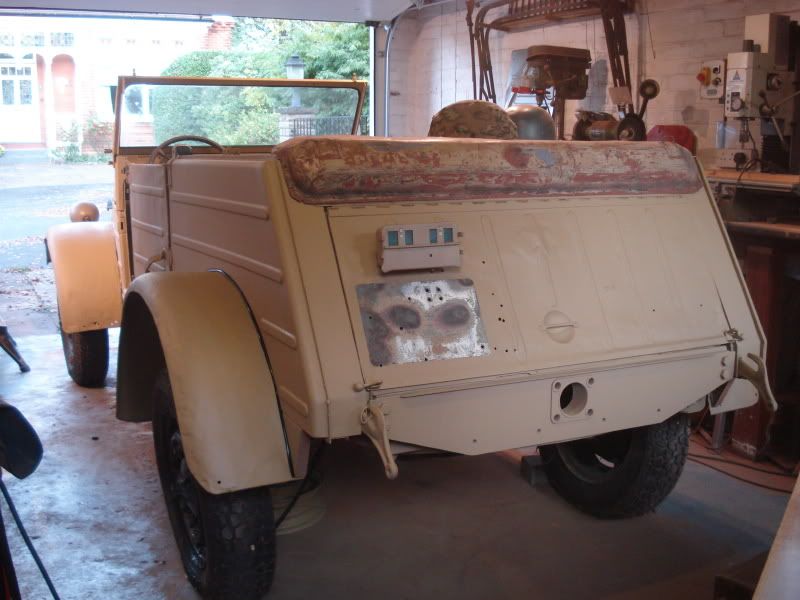 Regards Drew |
|
|
|
Post by drew on Oct 3, 2011 18:56:23 GMT 1
Hi All Here are the pictures from this weekends work. Tyres fitted to 16" rims and pulled out into the October sunshine for a couple of photos. Still need to fit the finished doors and have just bought an original rifle holder. Next on the list is to pull the new wiring loom through and start conecting everything up. 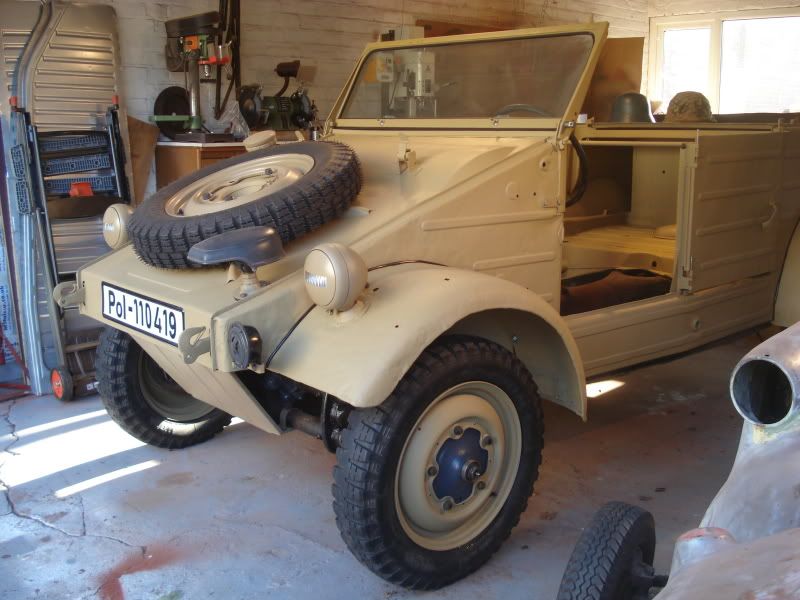 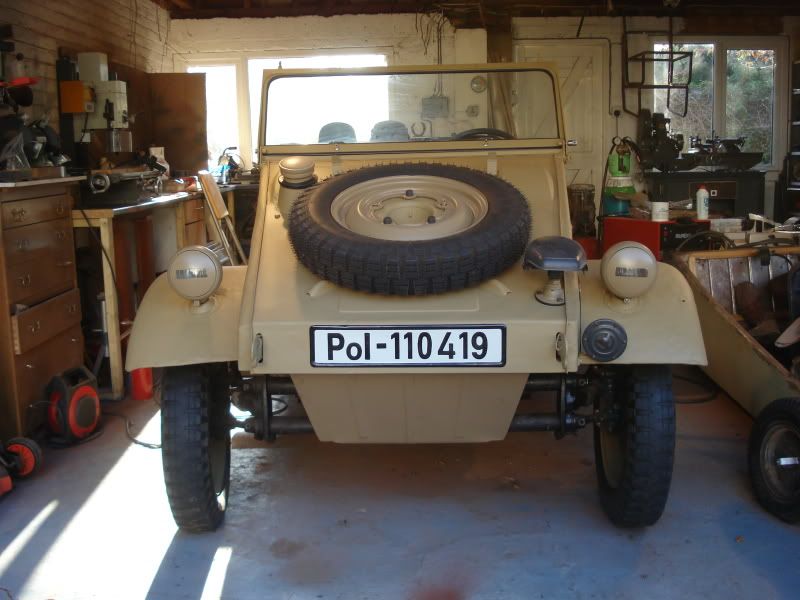 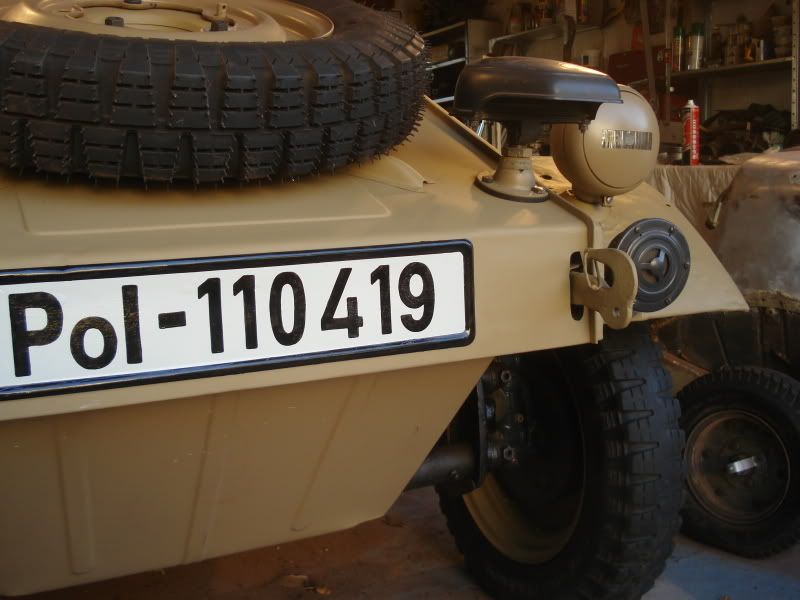  I will post more updates soon. regards Drew |
|
|
|
Post by drew on Nov 15, 2011 20:44:22 GMT 1
Hi All New wiring loom has been pulled through the body (took alot of pushing and pulling). 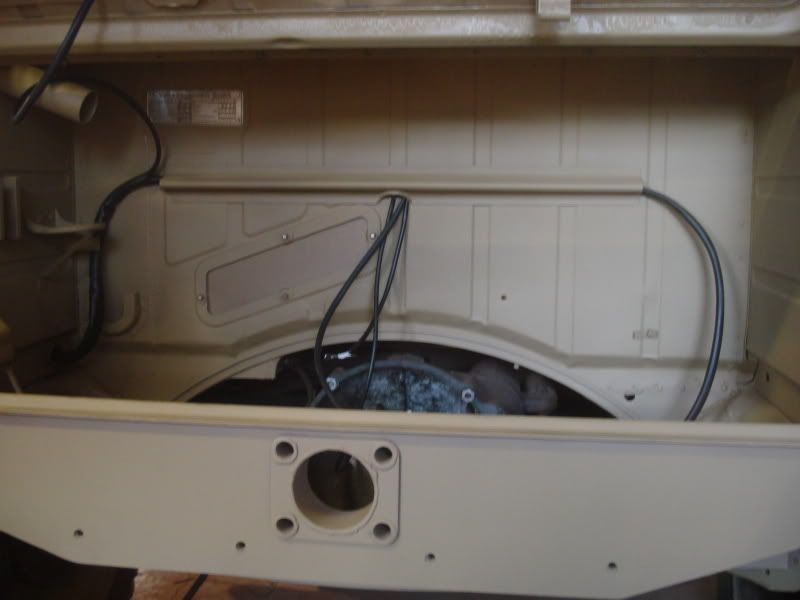 I have also started rebuilding the 1944 engine using all original parts. 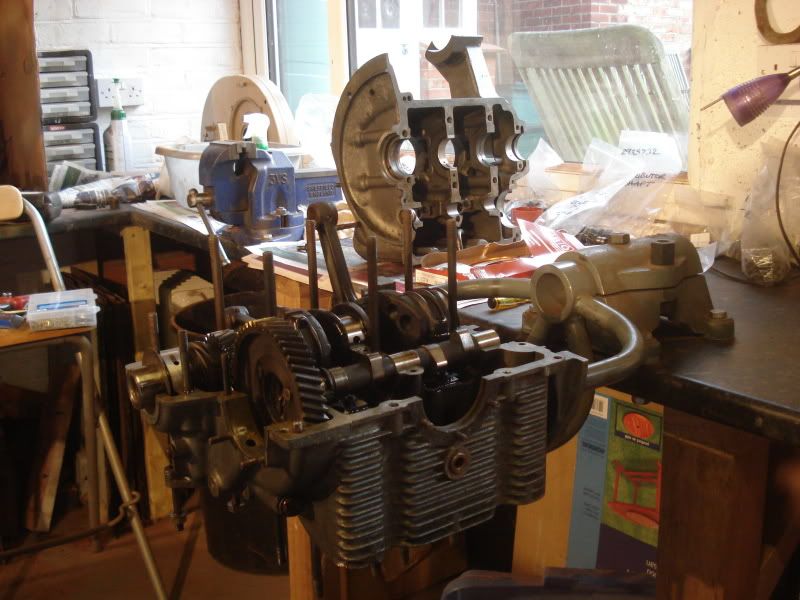 One question which I have also posted in the engine section. Do wartime engines have air deflector plates fitted underneath the cylinders? The ones below came from a 1950's engine. 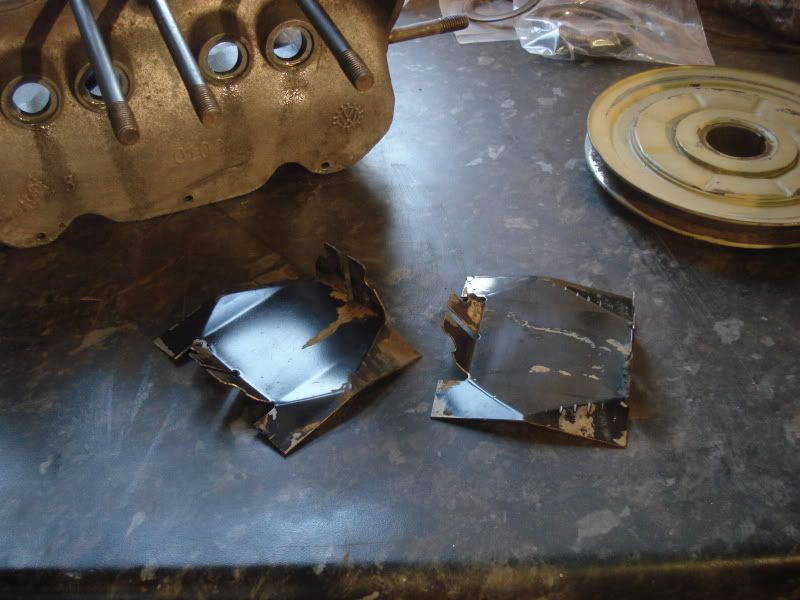 More updates soon. Drew |
|
|
|
Post by drew on Nov 15, 2011 20:56:36 GMT 1
Hi Guys To answer my own question, wartime engines had a very different form of air deflection. Here is a picture posted on the samba.com. 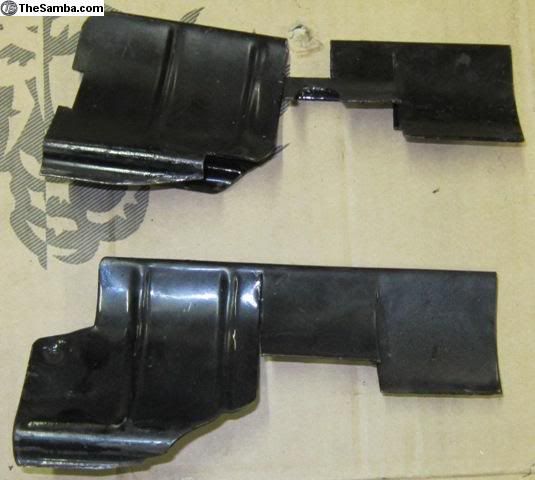 I have managed to track down a set but they will need a little bit of welding to get them sorted. Another new find is an original rifle mount, slightly different to the repro ones this one is bolted to the cross bar. 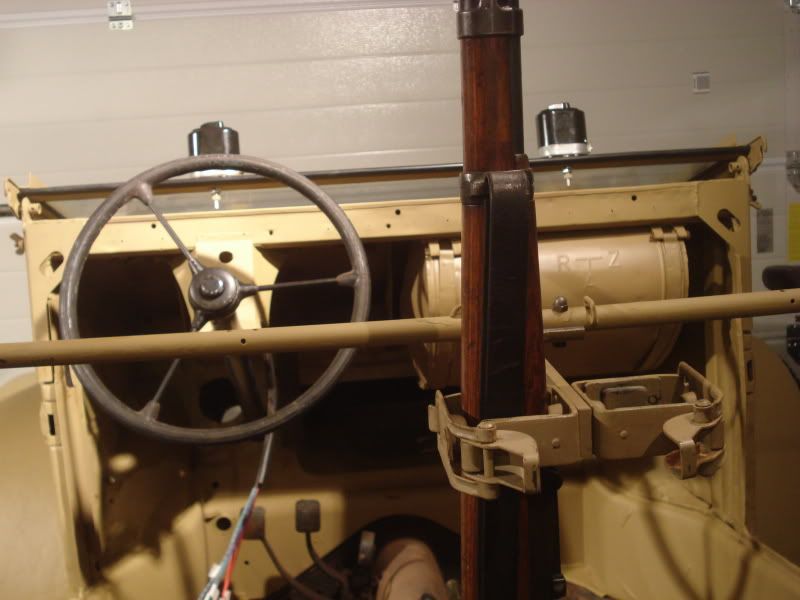  Next on the list is to refurbish the hood frame and fit the hood. Pictures to follow. Regards Drew |
|
|
|
Post by drew on Nov 27, 2011 14:24:39 GMT 1
Hi Guys Put the hood frame on last weekend and loosley fitted the hood, it's a bit tatty and marked but I think it looks 'worn in'. 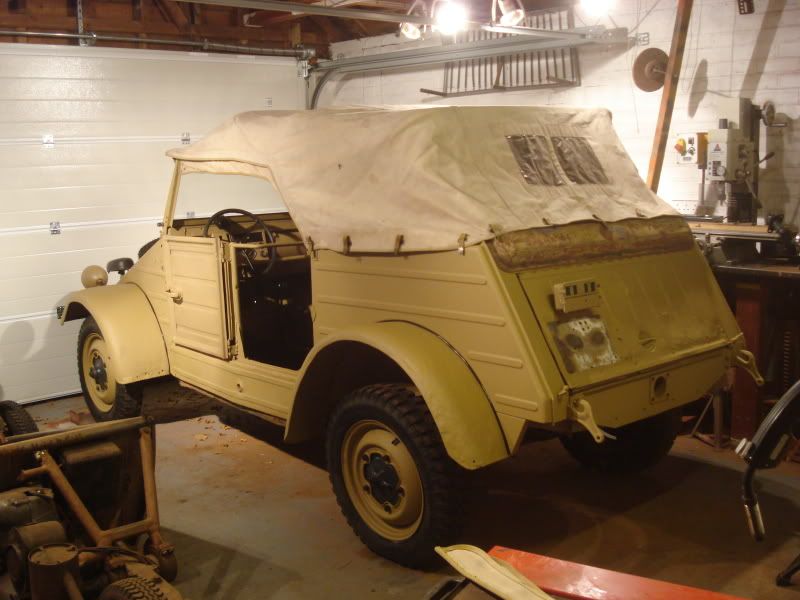 This weekend I turned to the 44 engine, it's been sitting, cleaned and dismantled on my bench for too long. So here are a series of pics as it all comes together. 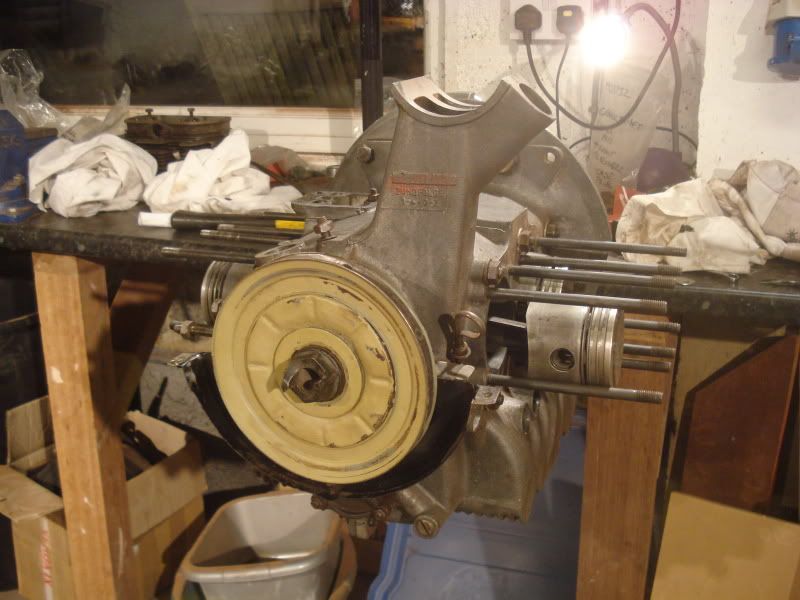 Here is the case matching number and casting date code. 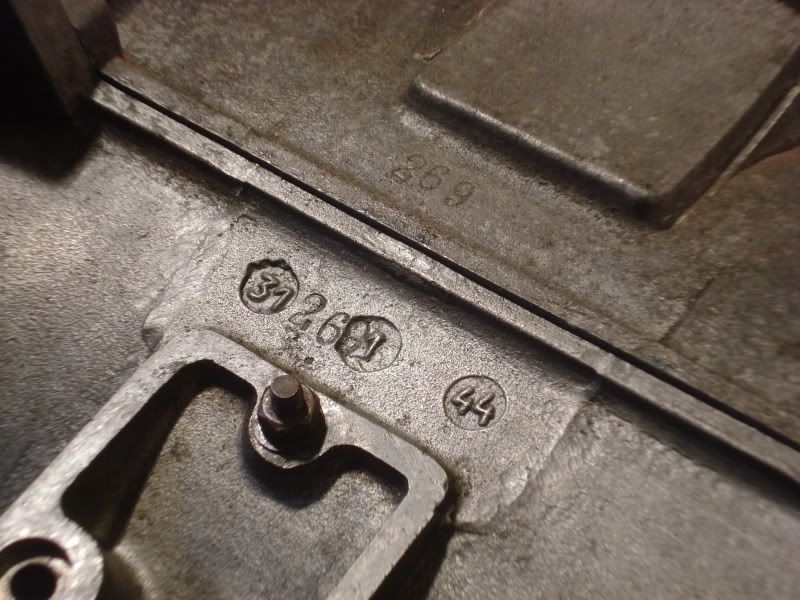 Trying to keep it close to 100% kdf, here is an original cog wheel oil pressure sencer. 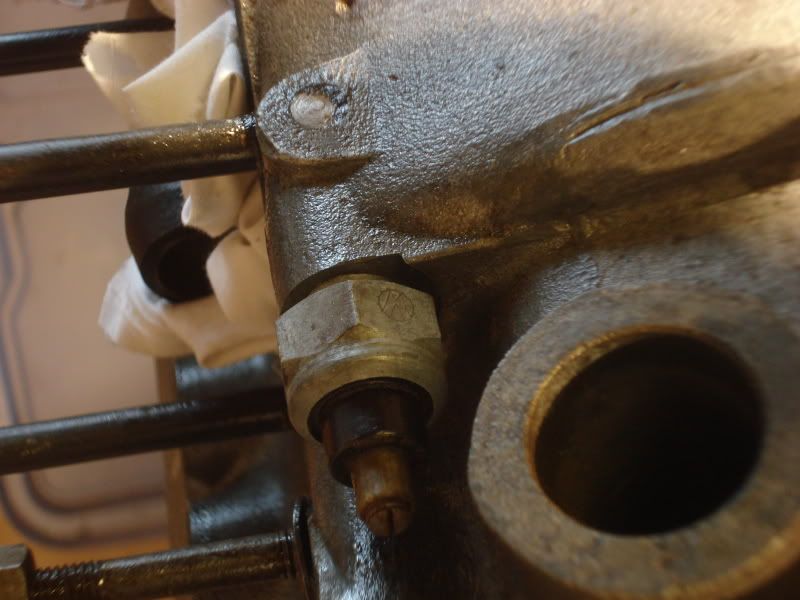 Original repainted tinware going back on, these cylinder covers have to be installed before the cylinders go on. 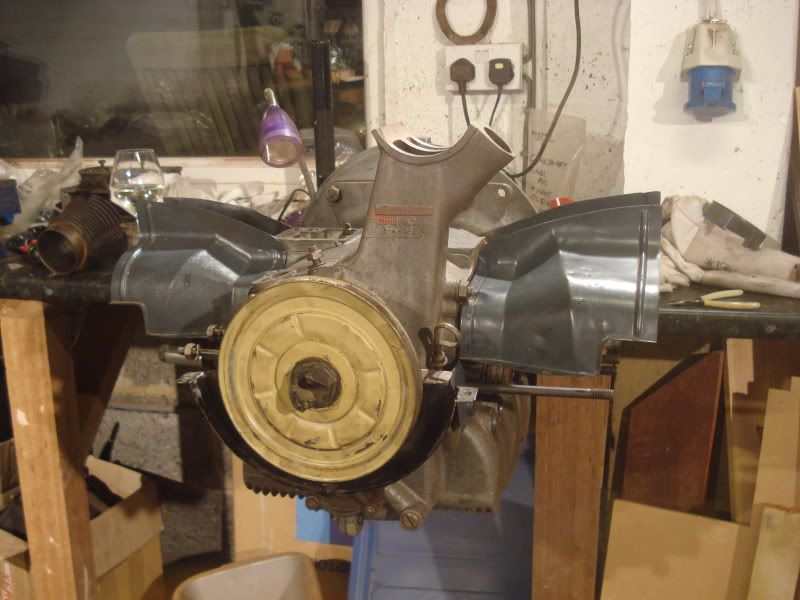 And here is one of the air deflectors in place. 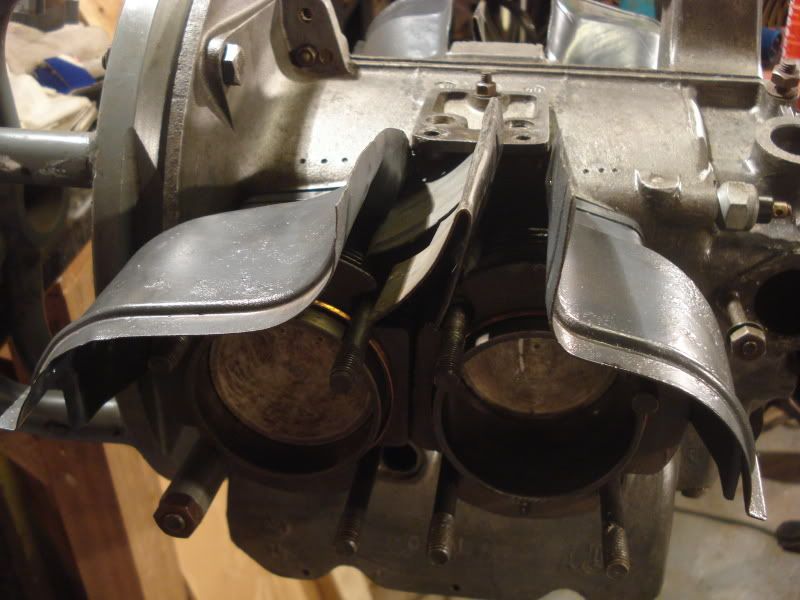 New pushrod tubes fitted with welded seem facing up. 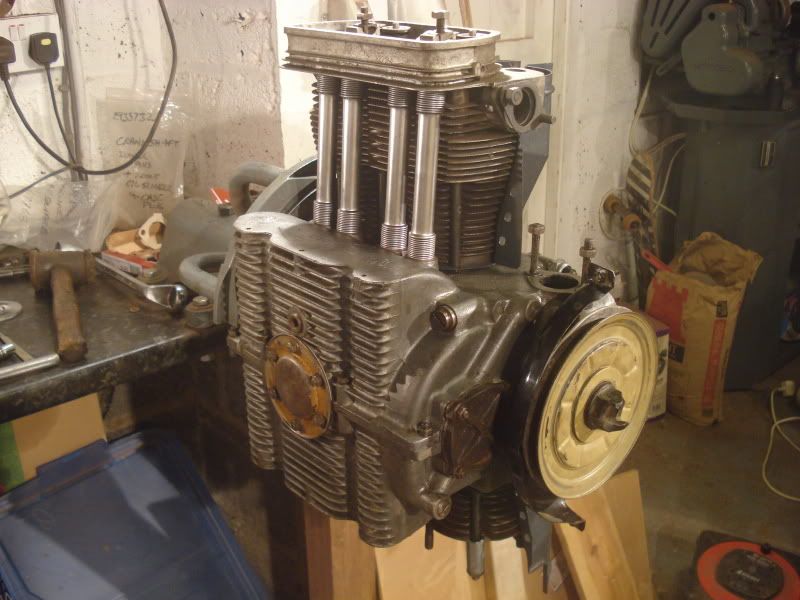 Rockers fitted. 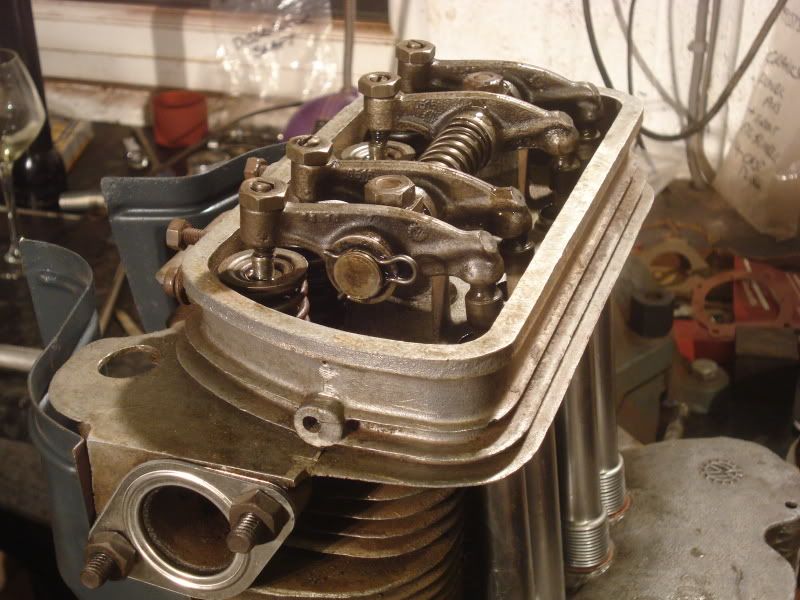 And finally the fan shroud. 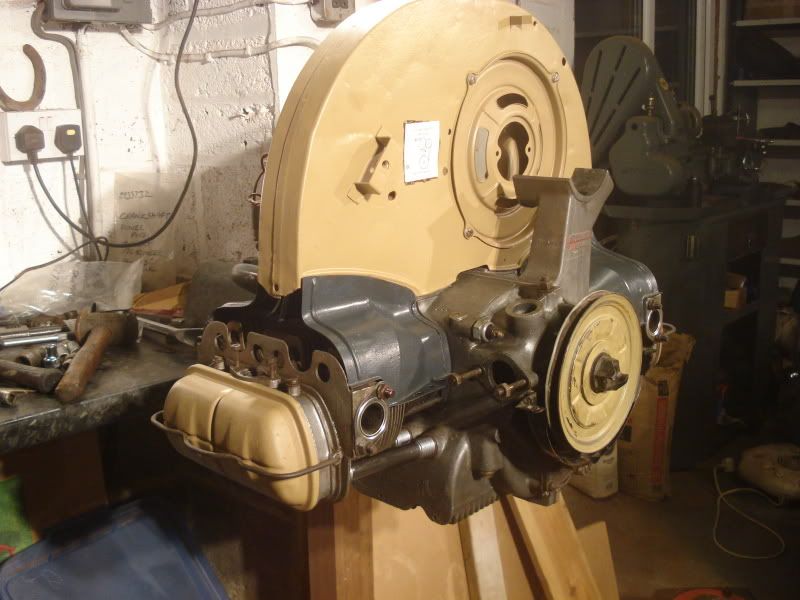 This engine should run well but I wouldn't push it due to it's age and rareity. Should be finished and in the kubel soon. Regards Drew |
|
|
|
Post by drew on Jan 2, 2012 15:33:27 GMT 1
Hi Guys As the engine rebuild continues I thought I would share with you the restoration of the original wartime distibutor BOSCH VEK4BS343T. Here it is as removed from the engine, not a pretty sight. 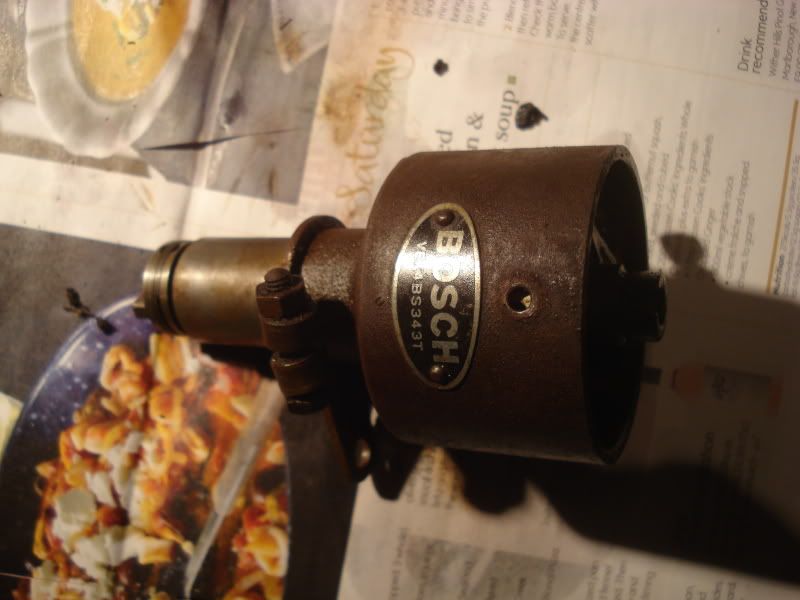 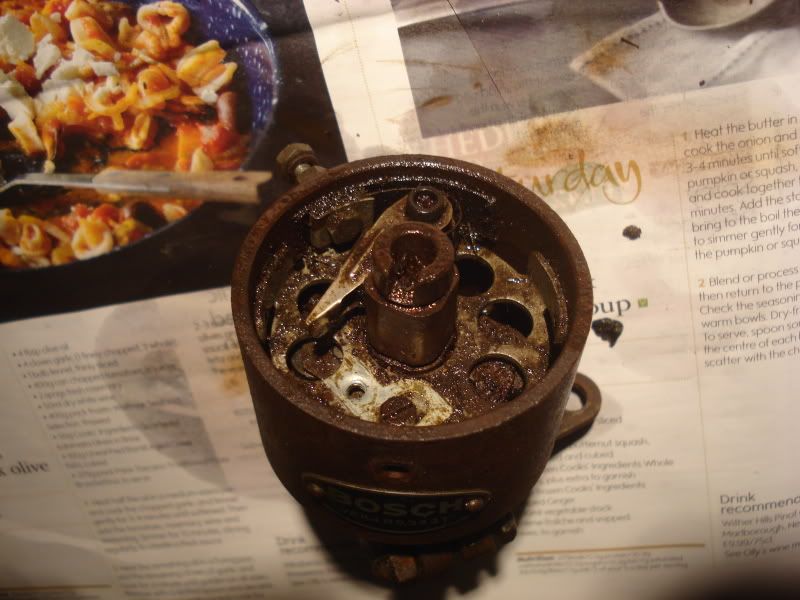 And here it is after dismantling and cleaning.  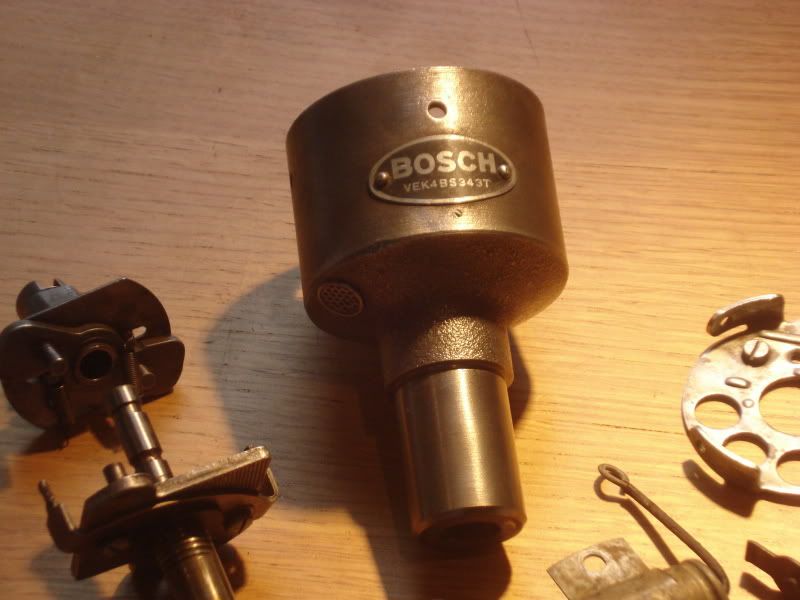 Have re-painted the body and just recieved an NOS distributor cap and rotor arm from Argentina of all places, now I can put it back together. 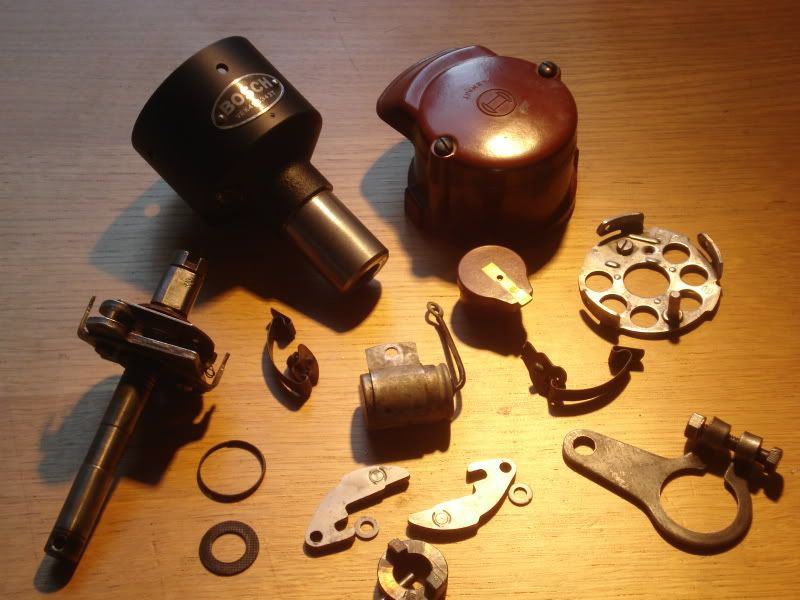 Have also been busy on the engine will share more build pics soon. Regards Drew |
|
|
|
Post by drew on Jan 2, 2012 15:53:39 GMT 1
OK here is the latest on the the engine rebuild, original cog wheel oil cooler has been fitted.  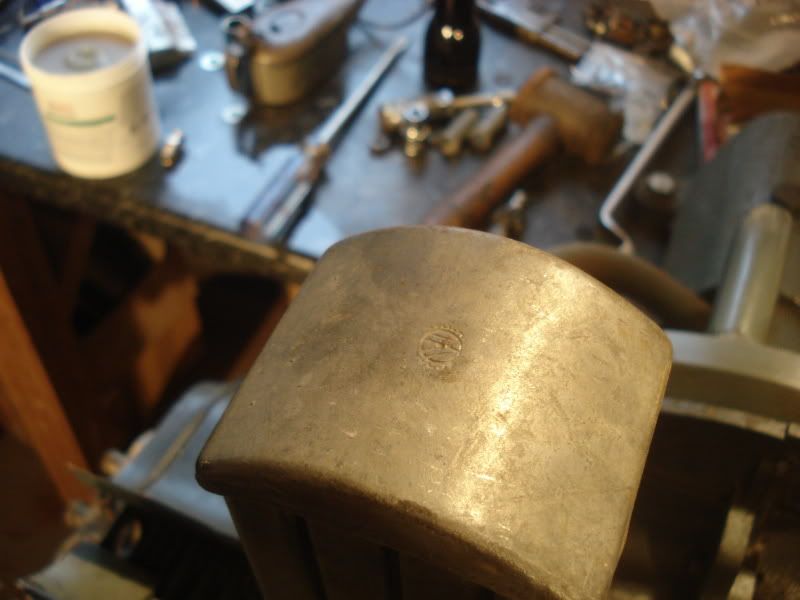 The fan, alternator, karb and manifold now in place and with the cyclone air filter fitted the engine is starting to look like it should. And yes before anyone spots it the intake manifold is post war as I am still searching for a good original K manifold.  More reports soon. Drew |
|
|
|
Post by drew on Jan 29, 2012 15:34:48 GMT 1
Hi Guys Here is the engine 99% finished, restored distibutor with new spark plugs,wires and caps fitted. Fuel pump cleaned and fitted, Flywheel fitted and endplay adjusted. Clutch fitted and a shinny new exhaust from Vladimir Lehar bolted up. I must say that the quality and fit was excelent. Only a few things left to do, fabricate new fuel lines, fit correct clamps to rubber connectors, fit original rear tinware, fill with oil and pop into kubel. 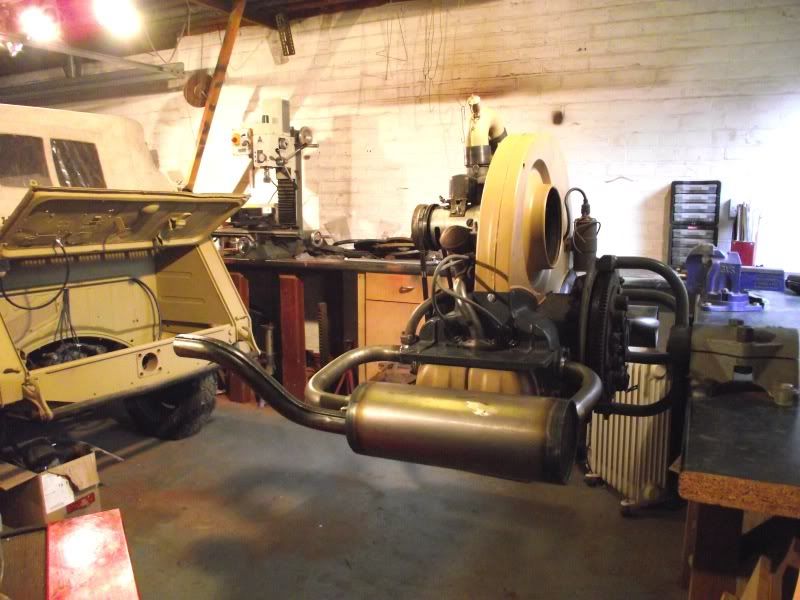 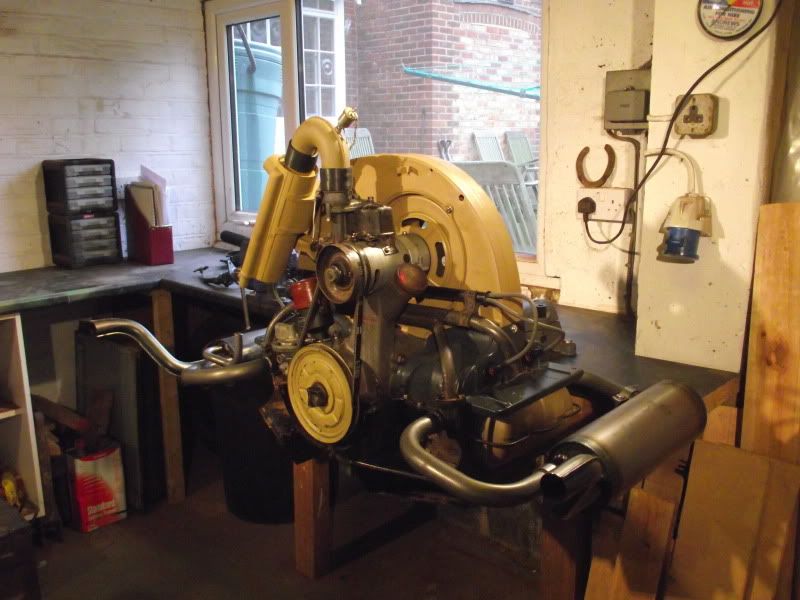 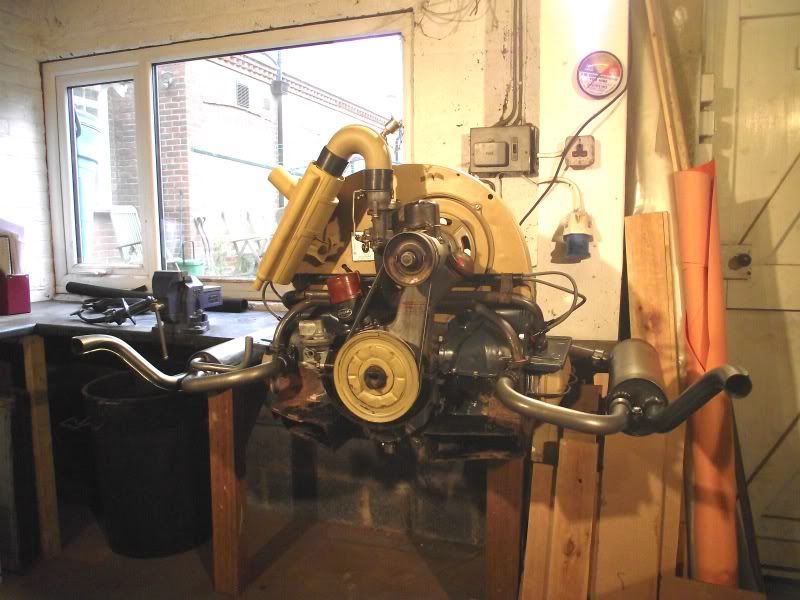 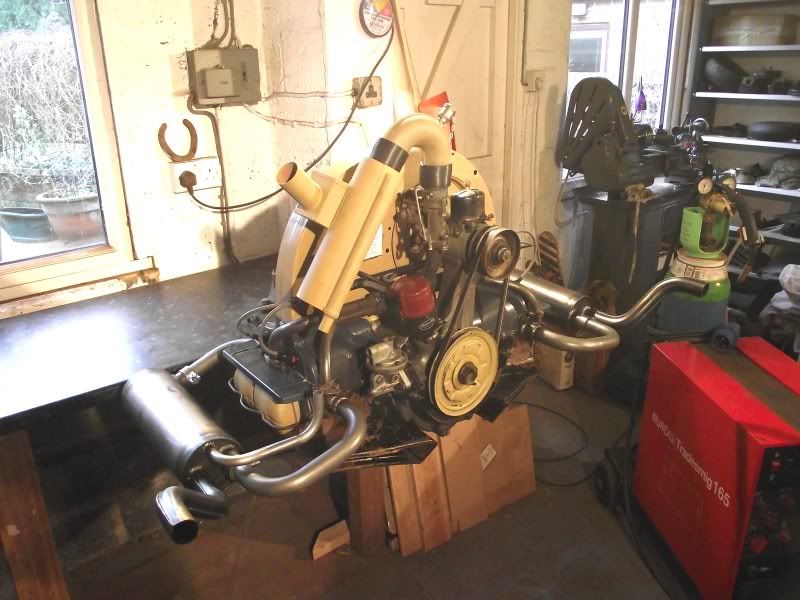  I am also making a large dolly to to take the body so that I can crack on with fitting the new floorpans to the chassis. Regards Drew |
|
|
|
Post by kdfvw on Feb 26, 2012 17:33:04 GMT 1
Hi all Kdf lover.
Does any one got a cyclone air filter for VW 166/82,82e or 87?
if you got parts for VW166,128, VW87 please kindly e mail me. My e mail
kdfvw@yahoo.com
I also like any war time beetle picture.
Thanks a lot.
Victor
|
|
|
|
Post by drew on Apr 2, 2012 9:59:27 GMT 1
Hi Guys Just in case you thought the radio silence was due to a successful sale of my Kubel you were wrong. I'm still working on her and yes she is still for sale. So this is the latest progress: Final tweeks to the engine and ready to install into the bay. 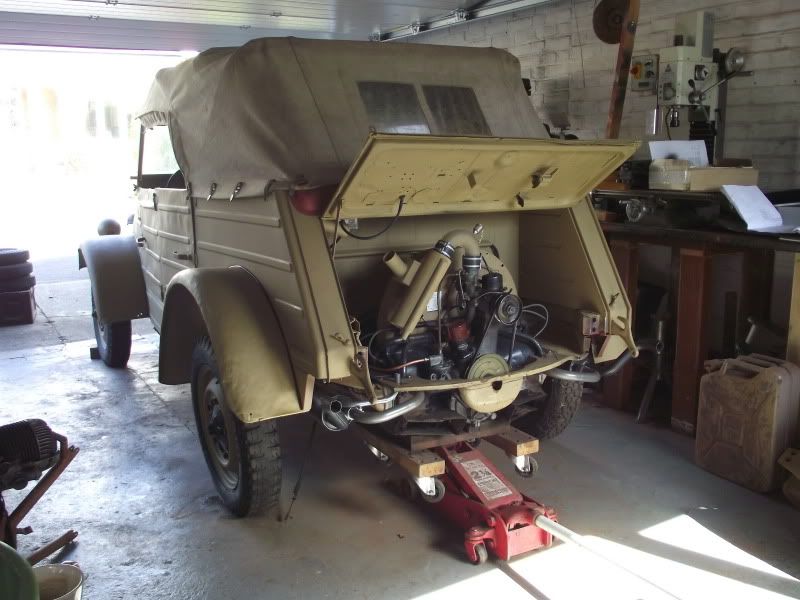 Fitted the doors. Sounds easy but getting original bent and buckled doors to close and stay closed (when another door is opened) is quite a challenge. 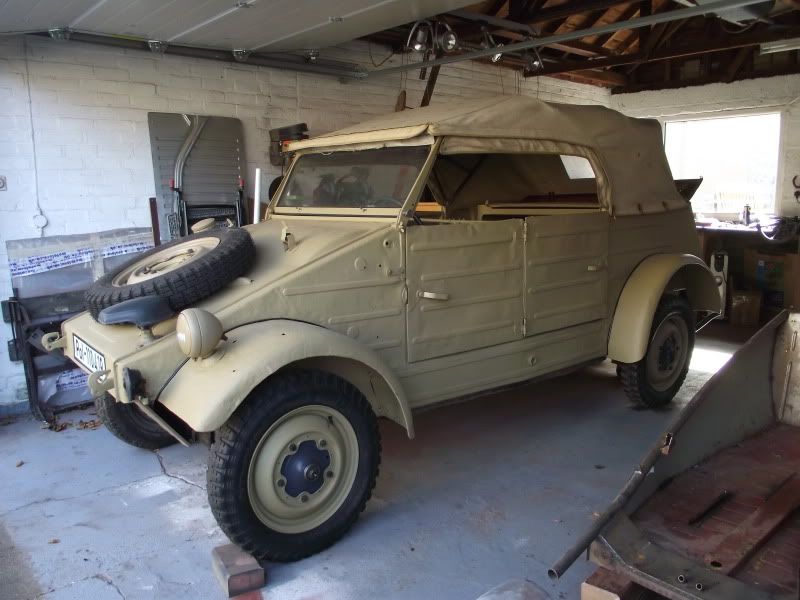 Also fitted the original engine air scoop so that the canvas hood could be tensioned and tacked to the front wooden bow. 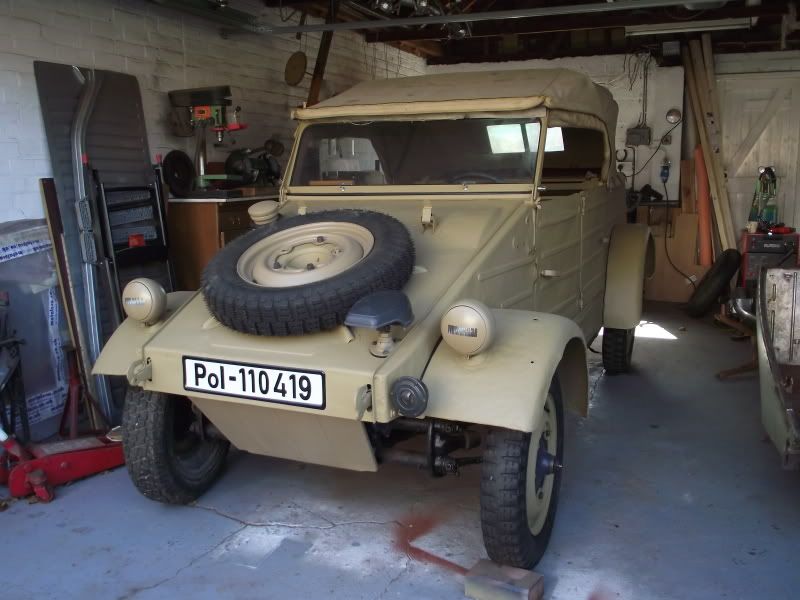 More updates soon. Regards |
|
|
|
Post by drew on Oct 2, 2012 13:22:34 GMT 1
Hi Guys Long time since last update (sorry) and in fact I have done very little apart from finally connect up the engine, paint and rivet on the air scoop, but hey progress is progress. And for those eagle eyed amongst you I have finally obtained 2 more original 16" wheels, blasted, painted and fitted the used tires. Oh and by the way she is still for sale (drew.s@inferno-group.com) Enjoy Drew 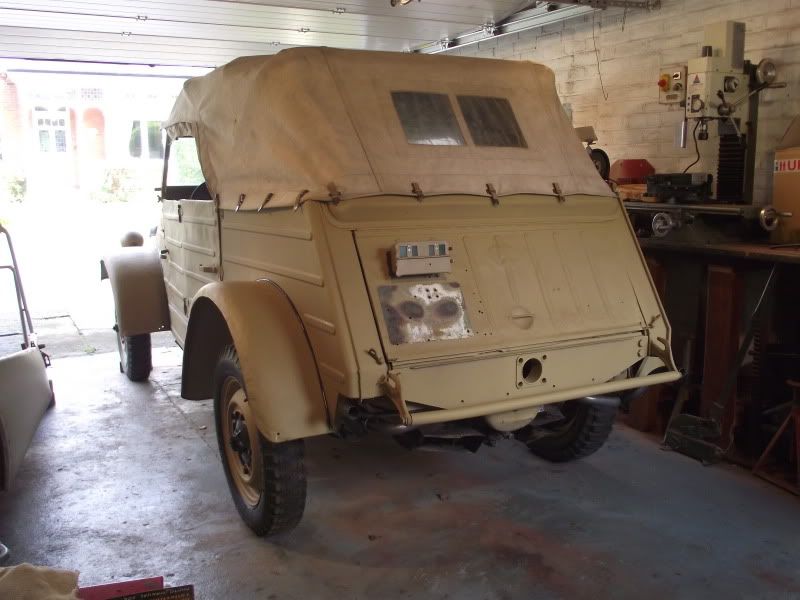 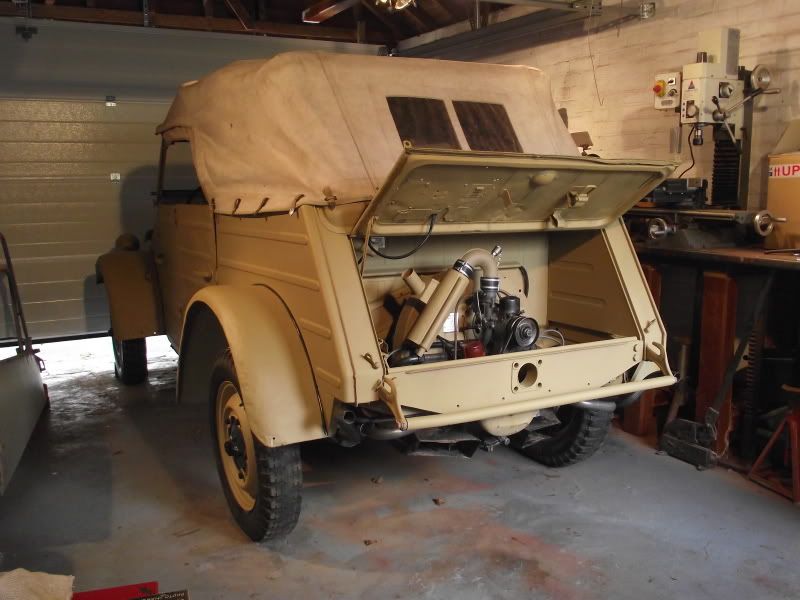 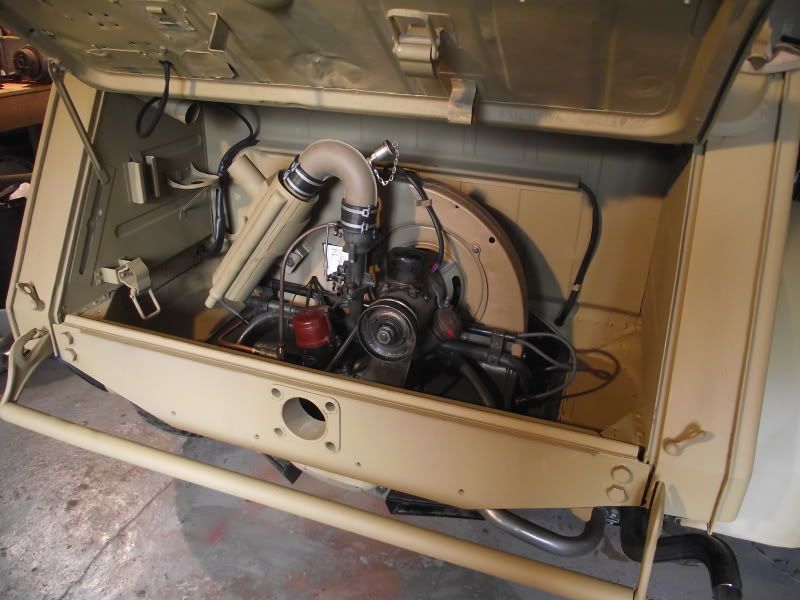 |
|
|
|
Post by drew on Jan 1, 2013 16:05:17 GMT 1
Hi Guys Merry Christmas and here's to a very happy new year to you all. As you know I have been trying to find a new home for my kubel. There is a very nice chap here in the UK who is going to take her, but he want's the floorpans installed so here we go... off comes the body again. 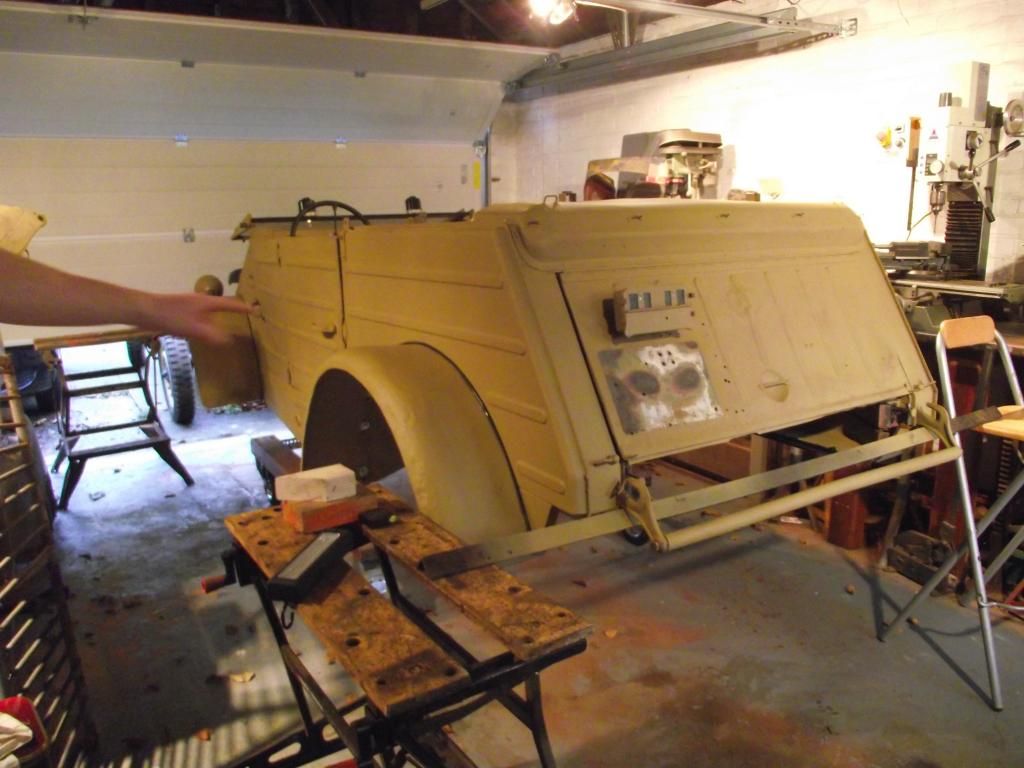 I have made a large castor dolly to move the body. 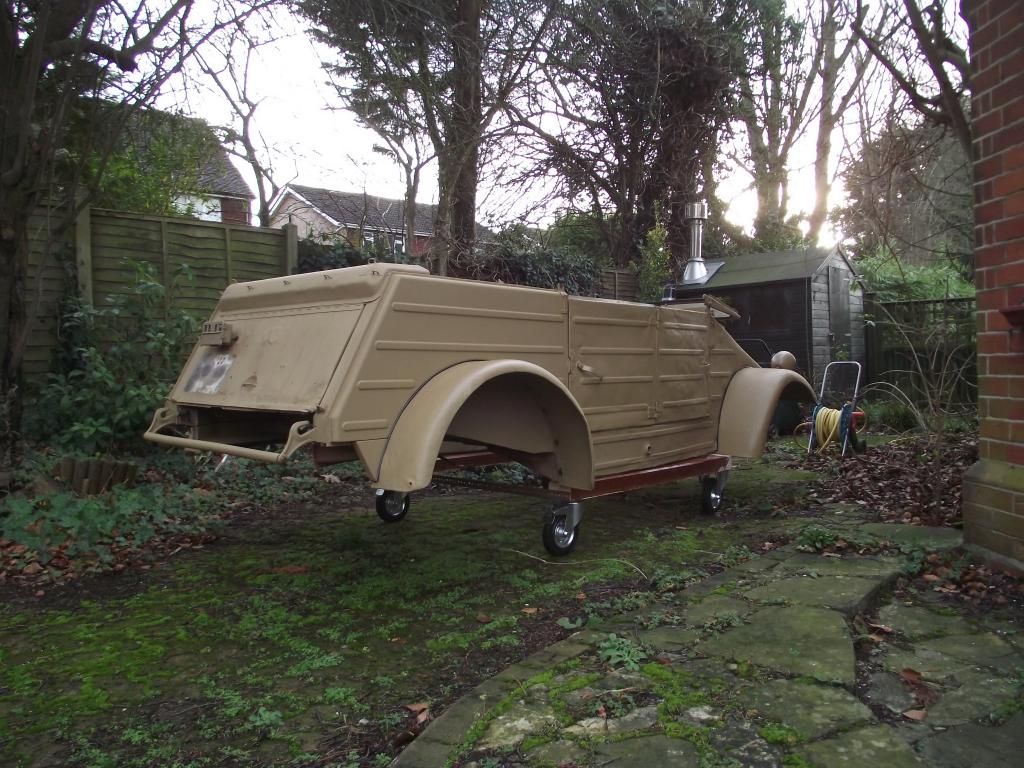 My latest Porsche is in the background.  With the chassis safe back in the workshop it's time to start stripping. 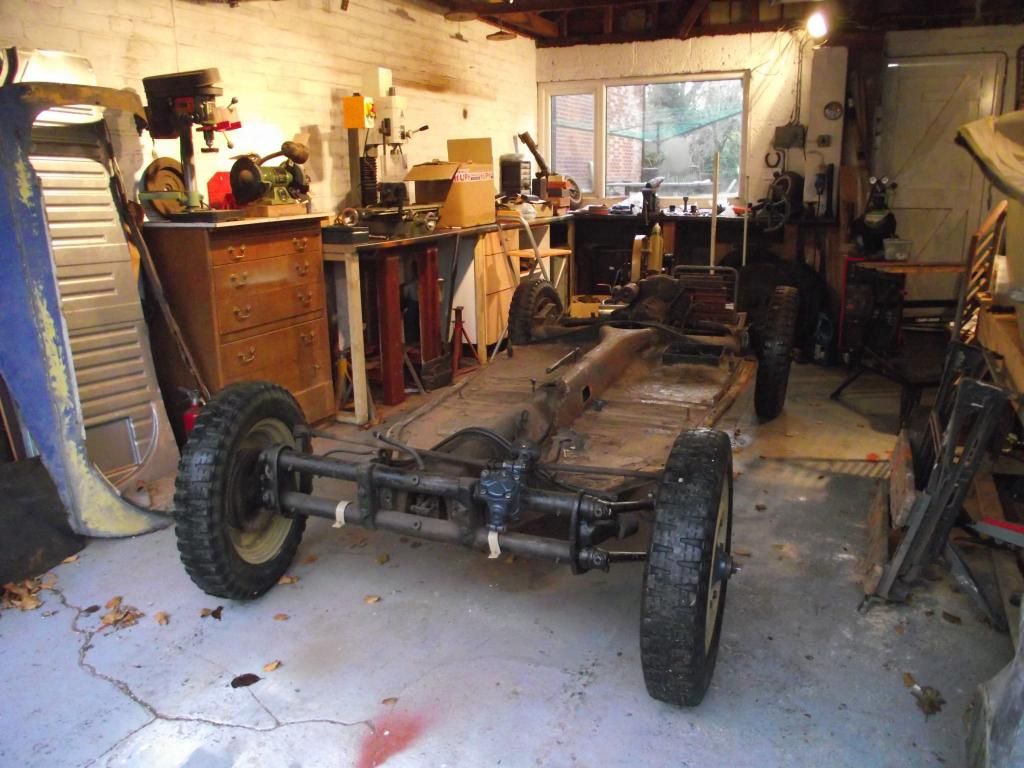 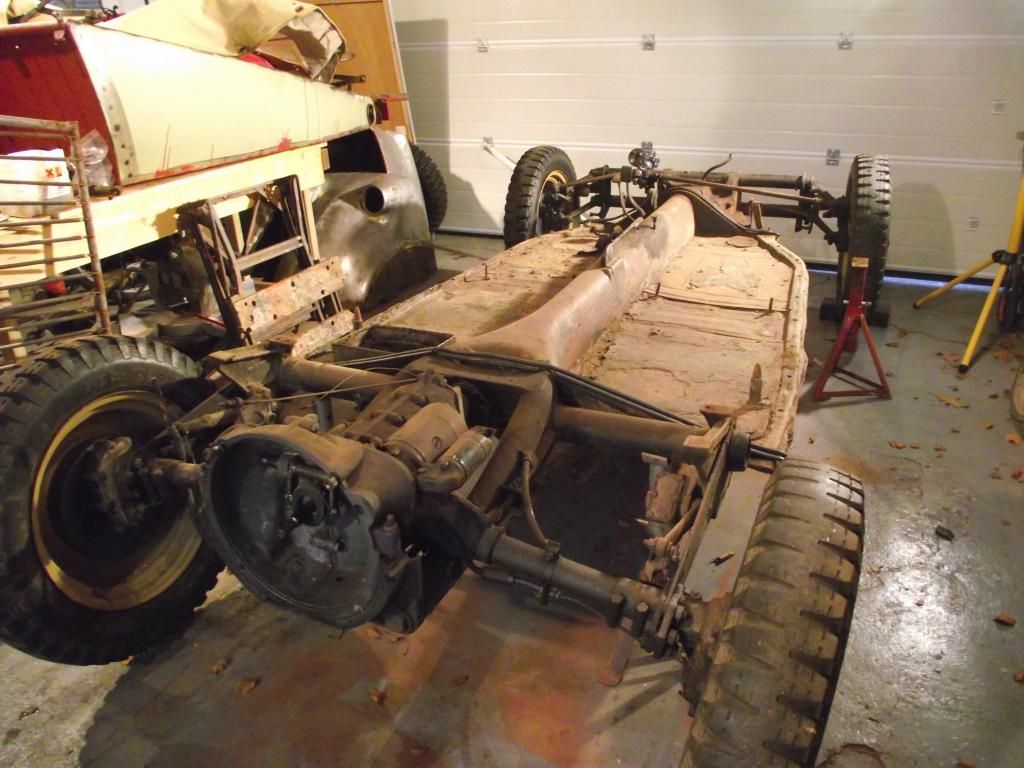 So far the front torsion bar assembly has been removed and next is to remove the gearbox. 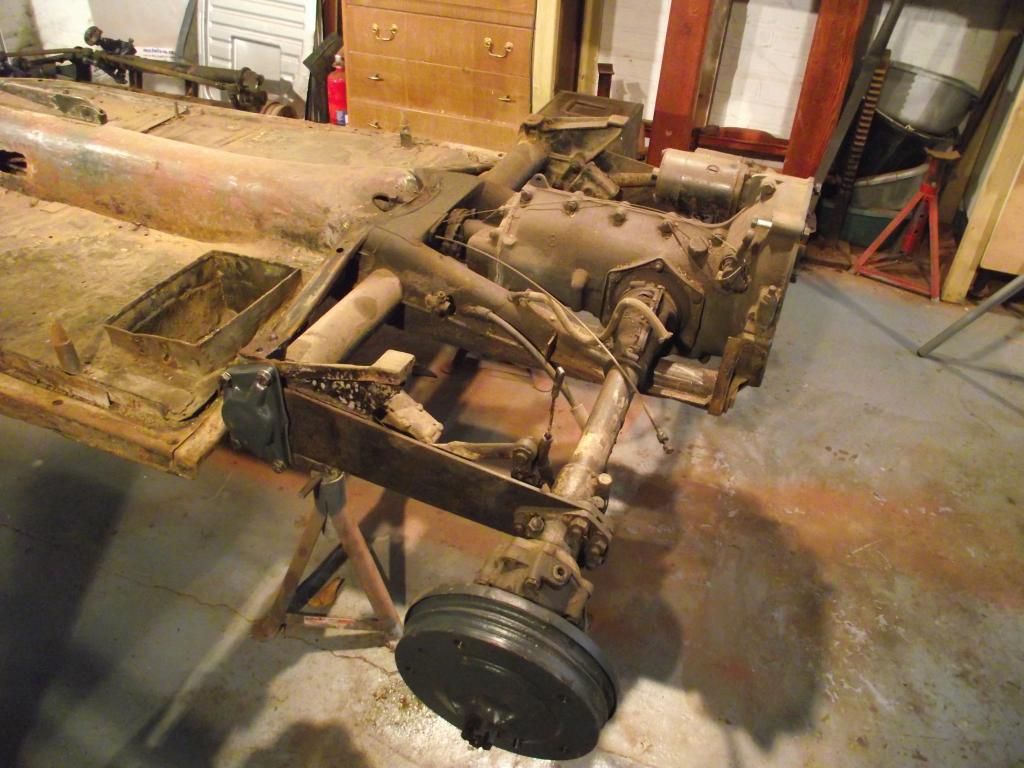 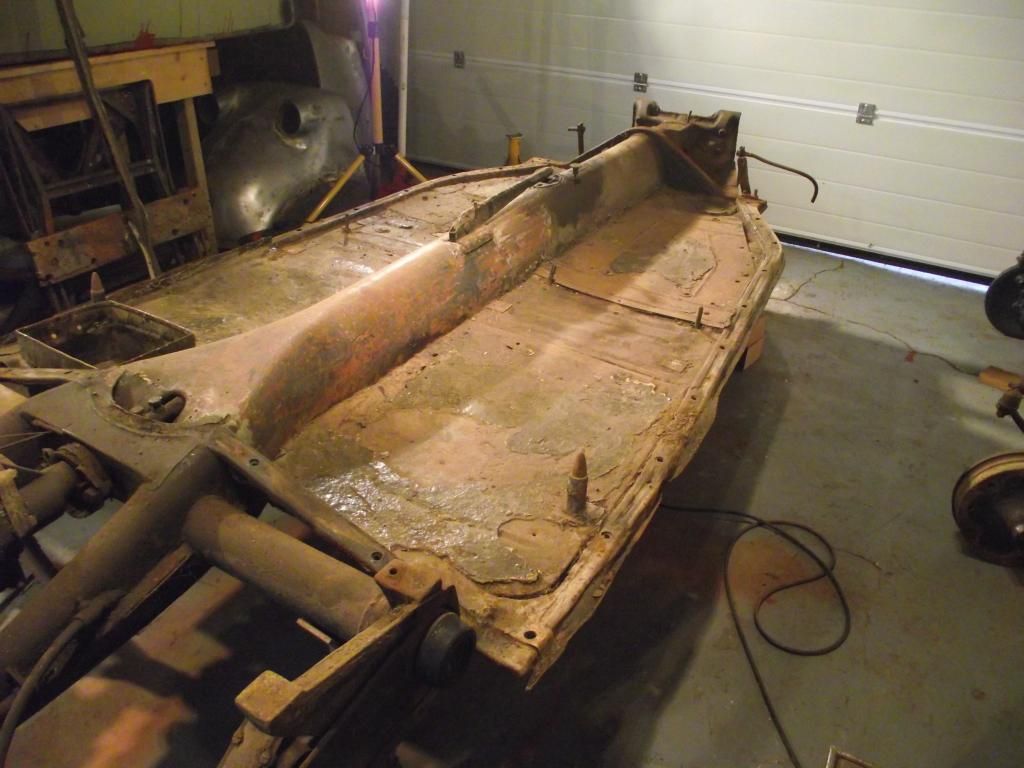 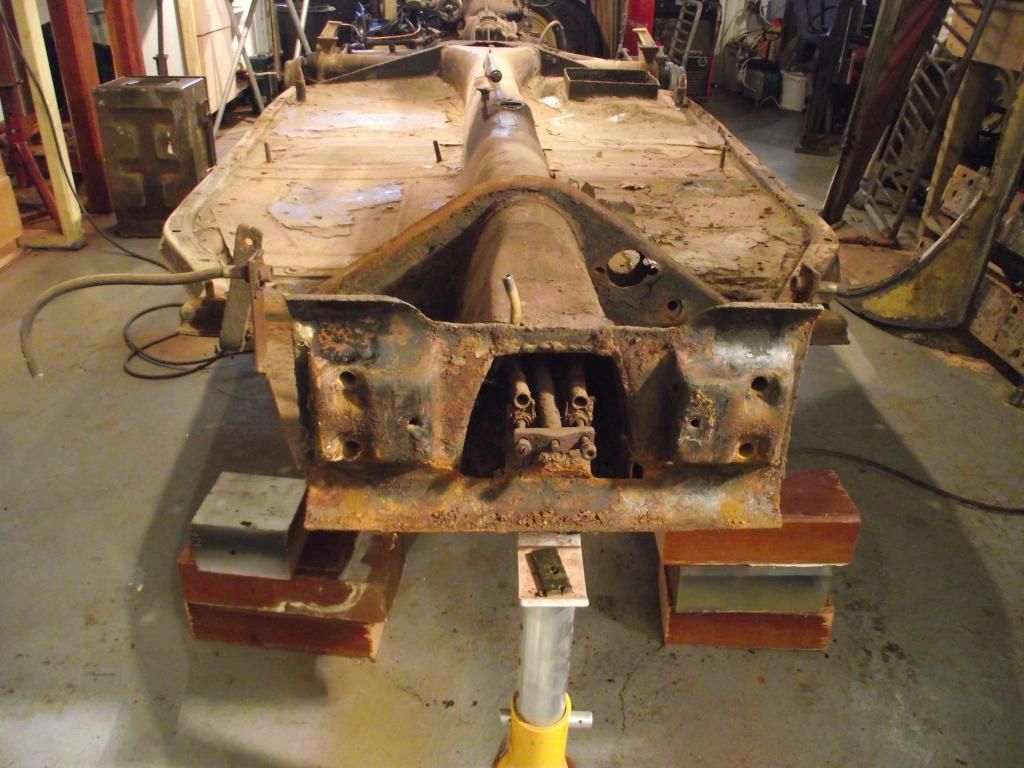 The next few weeks are going to be quite busy as I have promised to have the kubel all back together with engine running by the spring. Talk soon. Drew drew |
|
|
|
Post by drew on Jan 1, 2013 16:33:21 GMT 1
Hi Guys Before removing the gearbox I thought I would give it a clean up and take some close up pics. 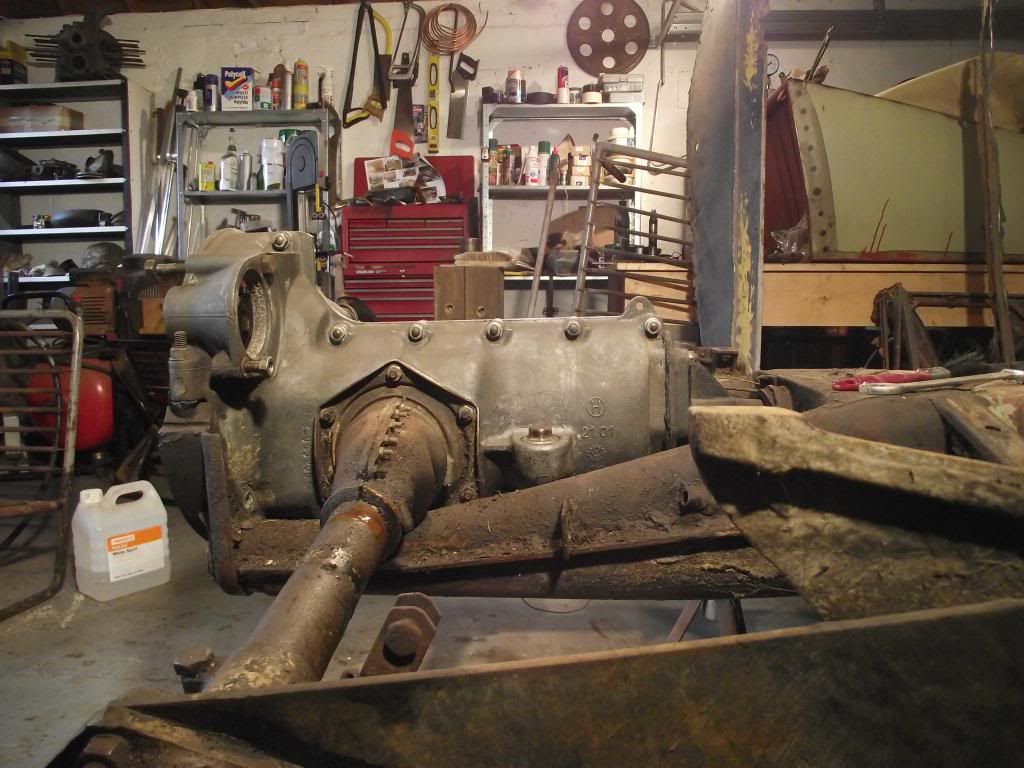  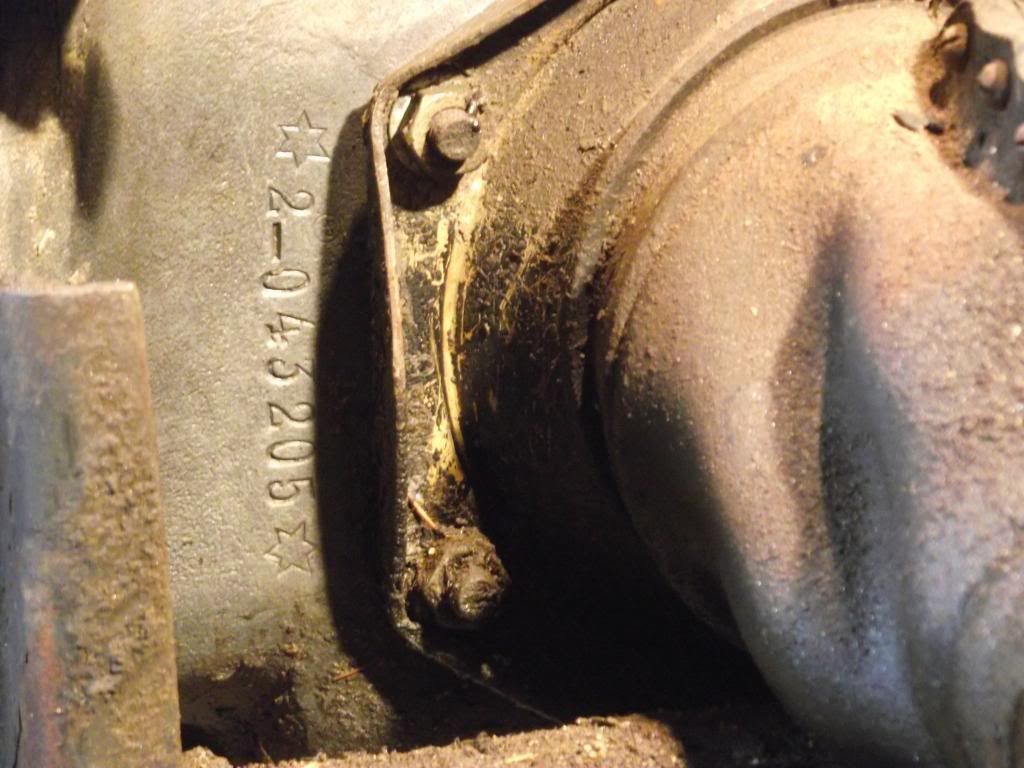 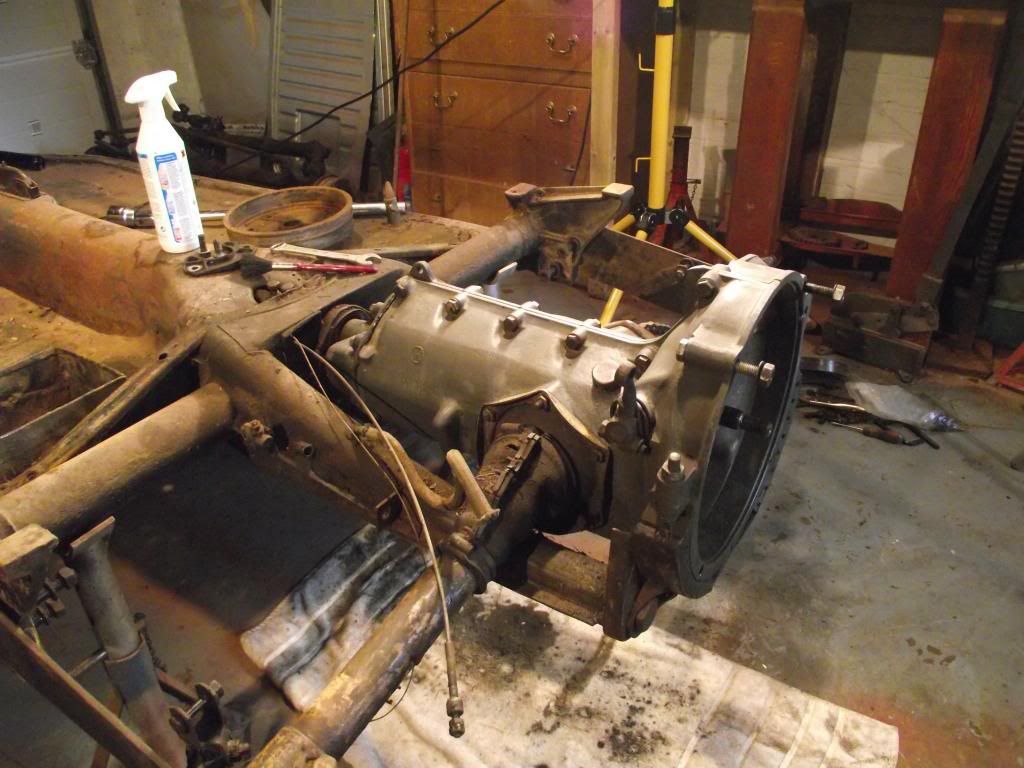 Next up is to measure the original floorpan mounting holes so that the new pans will line up exactly with the body. I will post a diagramme with these dimensions as it may be helpfull to others who are replacing rotten floors. Regards Drew |
|
|
|
Post by drew on Jan 6, 2013 21:26:00 GMT 1
Hi Guys Just a quick update. Out comes the gearbox complete with swing axles and reduction boxes. 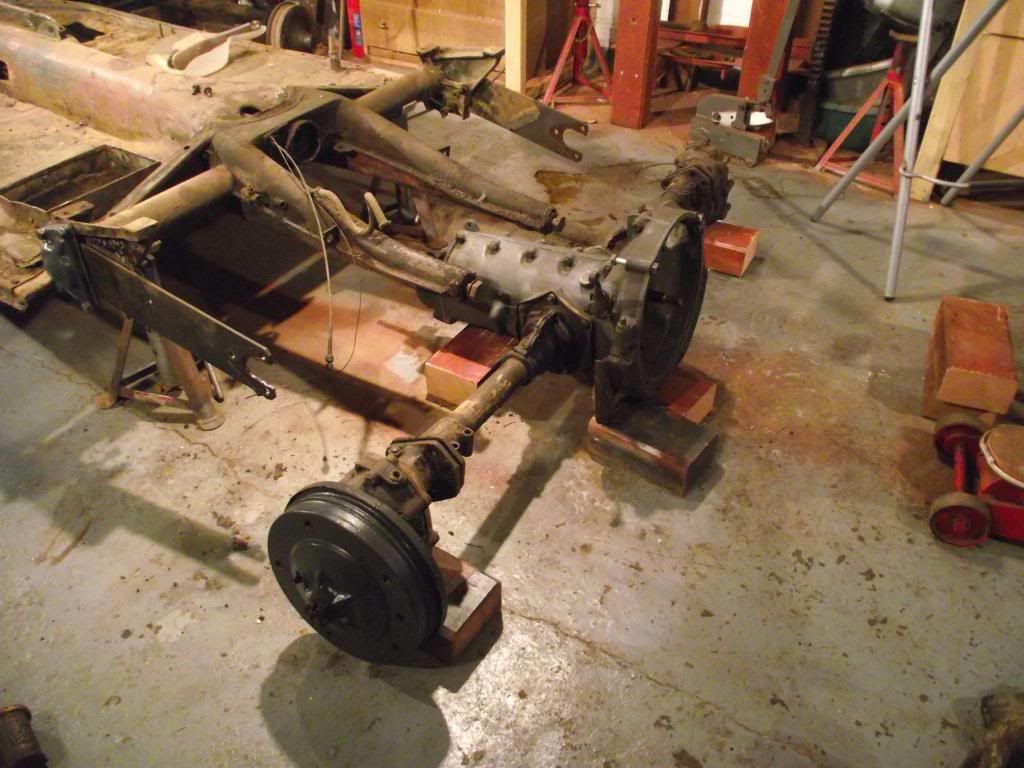 Time to start stripping back the underside of the chassis, I am only stripping the central section as the old pans are going to be cut out and binned. 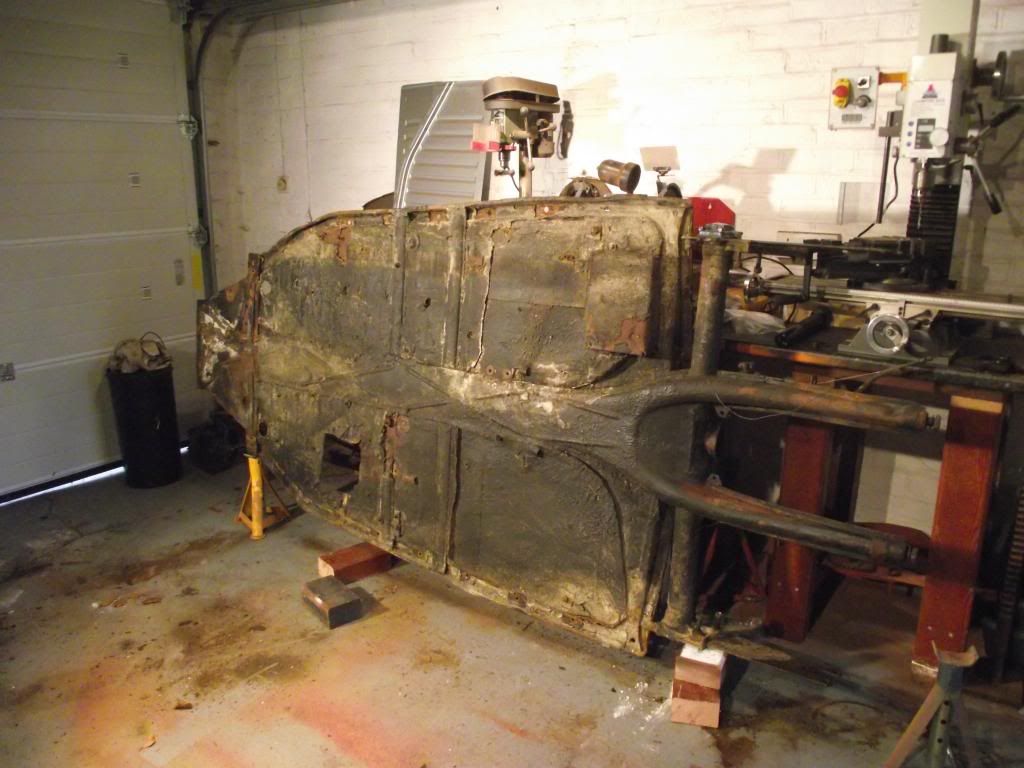 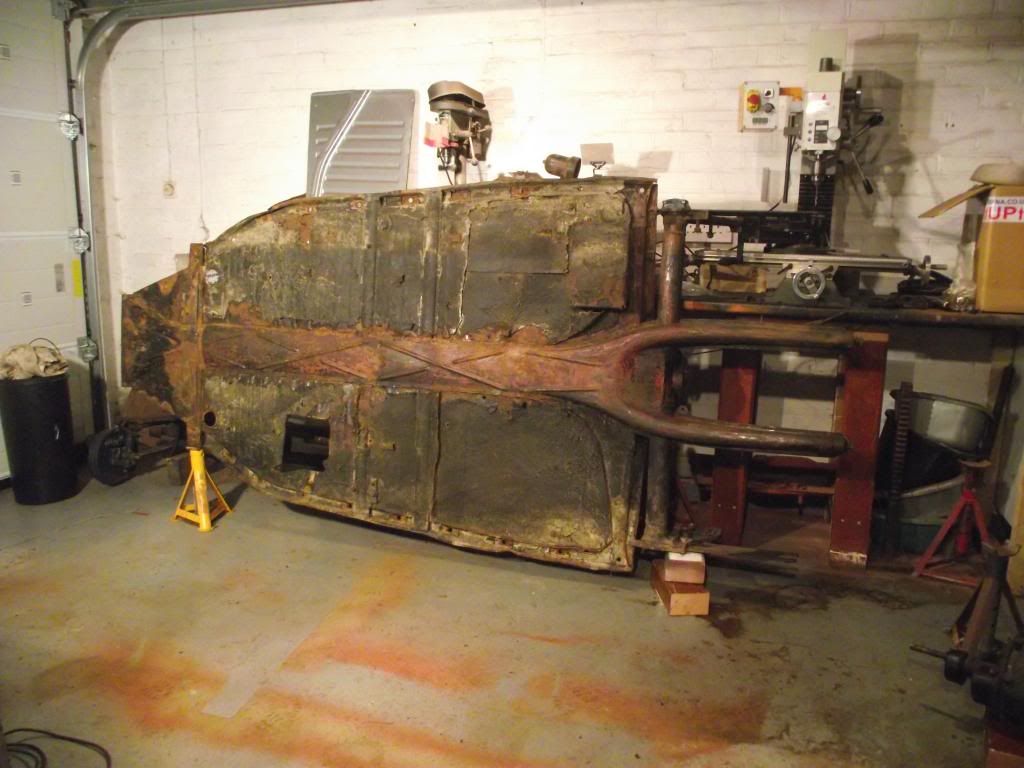 It's amazing how solid everything is under the coats of underseal. Too late to start cutting out the floors as it might keep the neighbours up. Have to wait till next wekend. Regards Drew |
|

